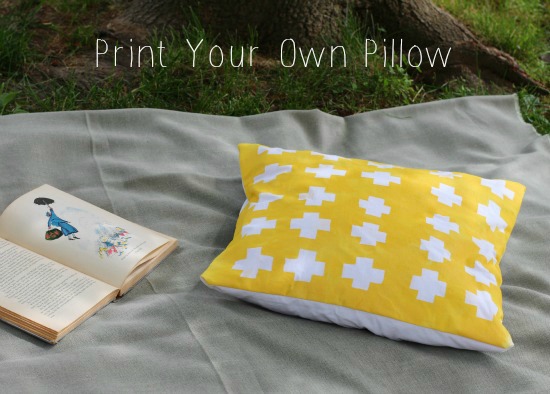
Last month I shared with you a really easy way to make a diamond patterned tablecloth. Today, I’m sharing with you another fabric printing idea that has the potential to transform the look of any room. The best way to inexpensively change the feeling of any space is by changing your throw pillows.
Or, as I prefer, just print your own fabric and make slipcovers for them! To make your own printed fabric, you simply need fabric paint and some solid colored fabric (of contrasting color) and you are in business! I won’t share with you tutorial today on making your slipcovers, but if you would like to find an easy way to do this, you can visit here (one of my favorite tutorials for zipper-free slipcovers).
For today’s project you will need just a few supplies and about half an hour or less to complete the printing (not including sewing time).
Supplies for Printing Criss-Cross Pillows:
- fabric paint
- a small roller paintbrush
- masking tape
- fabric
- scissors
- a shallow container (for the paint)
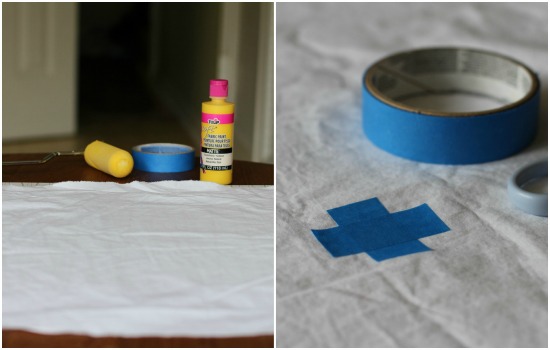
Step 1:
Lay your fabric (of whatever size you wish) on a surface that is covered or that can easily be cleaned afterwards. Pro tip: fabric paint always bleeds through fabric, so be prepared for this and be mindful of this while you are working, i.e. don’t shift the fabric’s position around.
Once you lay your fabric flat (you will sew it into shape later) begin creating small cross shapes with masking tape. I always eye-ball the length of the tape for two reasons: firstly, I think if you are making something handmade–it should look that way (gives it personality) and secondly, it’s much easier and less stressful than measuring. And seriously, how hard can cutting out pieces of tape be?
Make your first criss-cross shape in the middle of the fabric and work your way our creating horizontal rows.
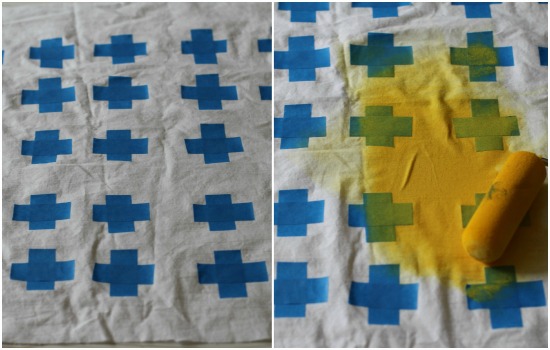
Step 2:
Once you have created as many cross shapes and rows as you wish, you are all ready to paint! Distribute a good amount of fabric paint in a shallow container and dip your roller brush in the paint. Begin painting being careful not to pull up any of the tape edges as you are rolling.
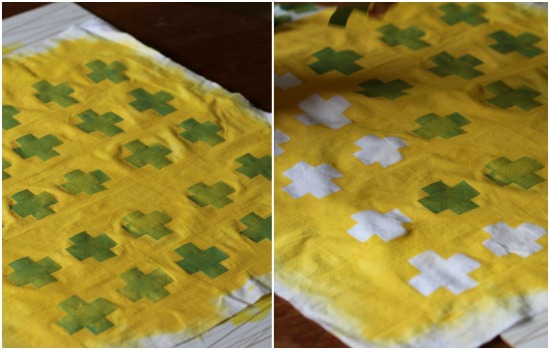
Step 3:
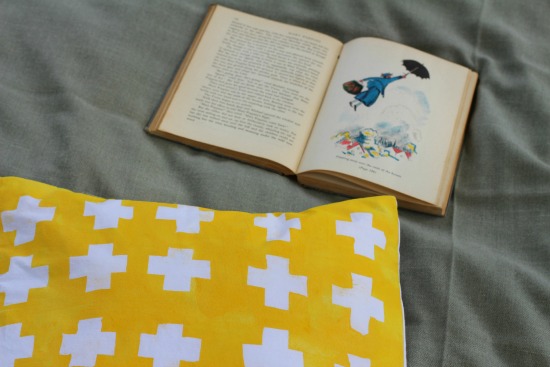
Once you are finished painting, remove your tape and reveal the little cross shapes! Hang your fabric to dry. The next step is to sew your fabric into pillow form. Or, you can make anything out of your handprinted fabric: tea towels, napkins, a tote bag or stretch it over a painter’s canvas and hang it on the wall!
Next month, I promise you won’t see another fabric painting tutorial from me. But seriously, who can resist and this is great information to pin! I mean, you can make your own fabric, everyone! I find the limitless possibilities in that to be so much fun, not to mention friendly on the ole wallet.
Happy fabric printing my friends and I will see you soon!


It looks so simple! My children would love doing this, just found another summer project for when they are bored! Thanks!
Robin, I think so. I’ve never used fabric paint for outdoor things but I can tell you I wash my fabric painted things in the house in the washer and dry them in the dryer quite often and they are very durable. I’ve never had any issues with paint peeling/flaking off. Also, the fabric paint does make the fabric less soft in texture and I would say to sleep on that might be uncomfortable but for use on throw pillows or outdoor cushions, I think it would work just fine for you.
I’ve been wanting to paint my outdoor fabric cushions. Would paint work for that purpose? Would it make the fabric uncomfortable? Would the paint flake off?
and by the way–my pillow cover had some imperfect sections (like where the paint bled through the tape a little (where I hadn’t pressed it down hard enough) but even so–it looked great. Nothing beats the cool look of handmade!
Lindsay, I used an old (but fairly good quality) sheet. The fabric paint (I like the Tulip brand matte finish paints) will make the fabric thicker in the area where you paint–almost the feeling of a chintz fabric when you use a sheet-like material. I’ve also had great luck with (get this) using a fabric painter’s drop cloth which can be purchased in the painting section of any hardware store (Lowe’s Home Depot) You can buy a large drop cloth (for under 20 bucks) and use it as a tablecloth or cut it into pillow-size covers. Let me know if you have any other questions. Just be sure of two things: buy enough fabric paint–for one larger pillow you will use close to one larger bottle of fabric paint and be sure to paint on top of a protected surface as the paint always bleeds through.
Love this idea! Definitely going to give it a whirl. What kind of fabric do you recommend? Cotton or maybe something thicker?
Thanks!
you make it look sooo easy! trying this asap :)
Yay! I’m so glad you are trying it. Seriously–fabric printing is addictive. Once you start printing, you’ll look at everything and think, “I can make that!”
:)