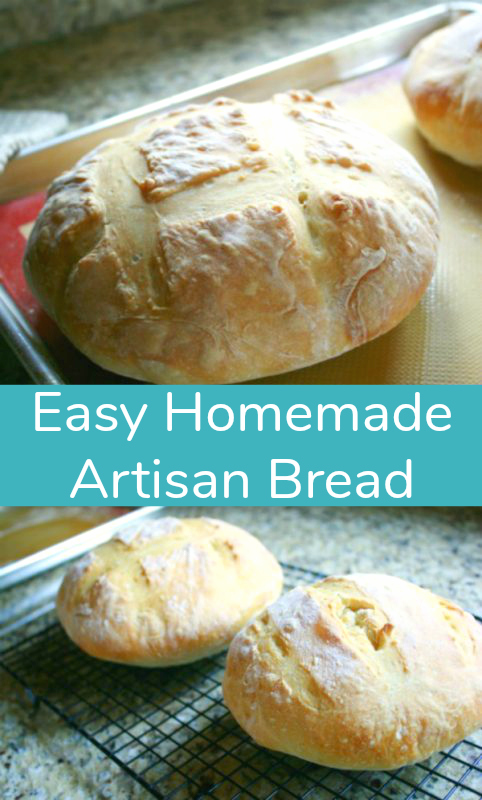
Easiest. Recipe. Ever – no joke! This homemade bread is simple to make and so yummy to eat. Thanks to my sweet brother, Ramon, who recently came for a visit, I’ve finally learned to make this delicious recipe for homemade bread that he makes all the time – Artisan Bread in 5 Minutes a Day by Jeff Hertzberg and Zoë François.

Easy Homemade Artisan Bread
If you’ve been intimidated to make homemade bread, your store bought days are over. I cannot tell you how easy it is to make this bread… so I’ll show you! Yeast is one ingredient I still don’t quite understand and this recipe allows for you to just dump it in with the rest of the ingredients. No need to spend any time letting it foam/raise/bubble/activate/whatever it does. And you can put this dough in the fridge for up to two weeks, letting you bake homemade bread anytime you want. I think I’m in LOVE with Jeff and Zoe and I’m ready to buy all their books!
Homemade Artisan Bread Recipe
makes 3 loaves
Ingredients:
- 3 cups lukewarm water
- 1 1/2 tablespoons granulated yeast
- 1 1/2 tablespoons kosher or other course salt
- 6 1/2 cups unbleached all purpose flour
- cornmeal for pizza peel (optional)
Method:
1. In a very large bowl, add your flour, yeast, and salt.


2. Pour in your water and stir until combined, just a few minutes.


3. Cover your bowl with foil or greased plastic wrap for 2-5 hours. We left it for 5 hours and it turned out just fine, yay!

4. Divide your dough into 3 loaves with a knife. Cover each loaf with flour and form it into a ball.

5. Lay onto a baking sheet with a silicone baking mat or onto a pizza stone sprinkled with cornmeal. Let this dough rest for about 30 or so minutes.
6. With a sharp knife, slash the top of each loaf into 3 lines or a criss-cross pattern. This helps let out some steam in the dough. If you don’t slash your bread, the bread will most likely make it’s own tear somewhere during cooking.

7. Preheat your oven to 450 degrees and add a small pan filled with 1 cup of water on a lower rack for a water bath. Bake for 30-35 minutes.

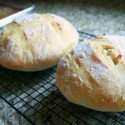
8. Place your baked bread on a baking rack to cool.

Now slice and add lots of butter or strawberry jam. Then revel in your new homemade bread baking skills, cuz’ you did it! You baked bread! Wasn’t that all too easy?! I told you! Next time, I’m going to try this with half white and half wheat flour. I’ll let you know how it goes.

Thanks to my brother, Ramon, for taking the time to teach me. It’s been fun to have a few members of my family join in on the Make and Takes fun!!

Artisan Bread in 5 Minutes a Day by Jeff Hertzberg and Zoë François.
- 3 cups lukewarm water
- 1 1/2 tablespoons granulated yeast
- 1 1/2 tablespoons kosher or other course salt
- 6 1/2 cups unbleached all purpose flour
- cornmeal for pizza peel optional
-
In a very large bowl, add your flour, yeast, and salt.
-
Pour in your water and stir until combined, just a few minutes.
-
Cover your bowl with foil or greased plastic wrap for 2-5 hours. We left it for 5 hours and it turned out just fine, yay!
-
Divide your dough into 3 loaves with a knife. Cover each loaf with flour and form it into a ball.
-
Lay onto a baking sheet with a silicone baking mat or onto a pizza stone sprinkled with cornmeal. Let this dough rest for about 30 or so minutes.
-
With a sharp knife, slash the top of each loaf into 3 lines or a criss-cross pattern. This helps let out some steam in the dough. If you don't slash your bread, the bread will most likely make it's own tear somewhere during cooking.
-
Preheat your oven to 450 degrees and add a small pan filled with 1 cup of water on a lower rack for a water bath. Bake for 30-35 minutes.
-
Place your baked bread on a baking rack to cool.
Artisan Bread in 5 Minutes a Day by Jeff Hertzberg and Zoë François.


I came on your recipe quite by accident and was so intrigued. I’ve tried making bread various times with little or no luck, so I’m scared of another disaster. I love homemade bread though so I’m definitely going to make this and see if I can actually have good homemade bread. THANK YOU for posting this.
So happy to hear! Please let me know how it turned out!
This is a hard crust recipe, if you don’t like that you can omit the steam bath, or wrap the bread in a tea towel after you take it out of the oven and it’s cooked for a few minutes, or do both. This will soften the crust.
Thank you for this recipe and easy to follow instructions! It is so easy to make and so YUMMY!!!! I use it all the time. My husband thinks “my bread” is the best. Love it.
This was easy and fun to make! Definitely adding some herbs and possibly cheese into the mixture next time around.
Perfect toasting bread too!
“the crust was very hard…. Any ideas on how to stop this from happening?”
right after you place your baked bread on a baking rack to cool down,
soften the hot crust with the butter
(I use fork and small piece of hard butter, butter would melt touching the hot bread )
it gave the bread buttery aroma and crust would soften
The remarks about yeast got my attention. It mostly works the same, and the need to ‘proof’ it sometimes applies. Basically, when you’re mixing the yeast with warm water and a little bit of sugar, you’re activating it from its dried form and giving it some food. If the mixture develops some foam after a few minutes (5 or 10 at the most) this tells you the yeast is good and healthy, hence the ‘proofing’ term. You don’t have to proof the yeast, but that extra step saves you the trouble of re-making the bread if the yeast is too old, has been killed due to improper storage, etcetera. If that happens the bread won’t rise enough.
Marie,
Thank you for posting this. I have made many different types of bread and this is by far the easiest and fastest and possibly the most versatile recipe that I have found.
@pat seader – you can use the 3 packs as long as it says “dry active” on the pack.
I use this recipe to make other “styles” of bread. Some of my favorites are:
Spicy Pizza Bread
– add a tin of crushed tomatoes, 1/2 teaspoon of cayenne pepper (dried) and 1/2 – 1 cup of 1/2 inch cubes of cheese to the dough when you are mixing all the ingredients together. You can use less water because of the liquid in the tomatoes. Allow the dough to rise, and shape and bake as usual. This is delicious, trust me!
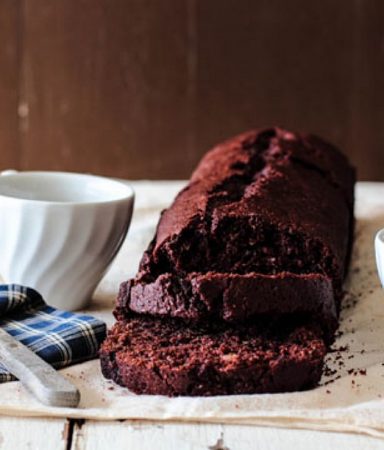
Chocolate Walnut desert Bread
– add 1/2 – 1 cup of chocolate chips, 3/4 cup of crushed walnuts, 1/2 teaspoon cinnamon, 1/2 – 3/4 cup of dried cranberries and 1/2 cup honey to the dough at the beginning of the recipe. Let rise and shape and bake as explained in the original recipe. This type tastes amazing when toasted with peanut butter!
Experiment on your own. Other easy types to make are cinnamon and raisin, and multi grain (I would suggest 1/2 white and 1/2 whole wheat and add sunflower seeds, and a mixed pack of “ancient grains” – this type will not rise as much because of the density.
Happy baking!
Jeremie
Great recipe! I am making for the second time and wondering if a portion of the dough can be baked in a loaf pan. Have you tried this?
Just got done cooling. Its very good. The upper crust was a bit hard. Was my oven too warm?
CAN I USE THE YEAST IN THE 3 PACK,IS IT GRANULATED? CAN’T WAIT TO TRY THIS BREAD RECIPE’I HOPE MINE COMES OUT THAT PRETTY.
THANK YOU FOR SHARING IT. PAT
This recipe is wonderful!! So easy and soooo good!! I will make this again and again. I also used some ot the dough to make fried bread, a treat we used to have growing up from my Italian family!!!!
I am about to make this bread, I have traditional yeast, do I need to to activate it before i use it?
IF THE DOUGH IS SAVED IN THE FRIG, DOES IT NEED TO COME TO ROOM TEMP BEFORE BAKING?
I just made this bread today. OMG!!! this is the best bread recipe I have tried and it is so easy to make. During the waiting time 4 hours I baked up a batch of muffins. This is my go to bread from now on. Hubs loved it.
To those people who added “extras” to the dough, like roasted garlic, herbs, cheese, etc…
Did you just mix it into the flour, yeast and salt, before rising?
Or did you mix it into the dough, after rising?
Make sure you use BREAD flour for your bread adventures. This flour has a higher protein content, and makes a stronger gluten,so your bread when baked won’t be so crumbly. Keep Kneading!!!:D
I used this bread it was the best.I put wildbillis All Purpose blended Spice in it and my friends went crazy over it. You can also find this spice at Nelson Farm Store , Nelson N.Y. Try it you’ll LOVE it too. E-mail me and tell me how you like it,
I’ve made this with my wildbillis all purpose blended spice and it was the best thanks so much. This went GREAT with Chilli and Speghitti Thanks again You can find my spices at Nelson Farm Store, Nelson N. Y.
Hello! Thanks for posting the recipe. I just gave it a try today and the inside of the bread turned out wonderfully but the crust was very hard. I left it in just a bit shy of 30 minutes and followed the recipe exactly. Any suggestions would be so appreciated. Thanks again!
Penny,
Wrap the bread in plastic after it cools a little and dont cool it on a wire rack, leave it sit on the cookie sheet. These steps both soften the dough.
This recipe turned out GREAT… made the dough at midnight! and I let it rise for 7.5 hrs, then started the oven, and shaped the 3 parts into balls, and put on a cookie sheet with a silicone baking mat under it. Forgot to put the pan of water (what was the reasoning for that?) and I added a couple handfuls of shredded cheddar cheese to one while shaping the ball. All 3 loaves were Wonderful! Next I’m going to sprinkle herbs on top of one, and mix some in to another. THIS is my Go To Bread from now on. THANK YOU.
love ‘real bread’ with the flavor of yeast but don’t make it often. tried this recipe and it is so delish, great flavor, tender and crusty. This is a keeper in my recipe library! I think it would also be a great bread to make with your children.
This bread is so good. But what would like to know may I feezaz this bread dough? And is yes for how long. Thank you please let me know ASAP. I would like to make some for gifts.
If I don’t want to bake all at once, do I refrigerate before it rises or after?
Will this work without the baking sheet or pizza stone? I’m kind of on the low cash end of things and can’t afford these at the moment.
I have made this bread often and I use a piece of tin foil instead of a baking sheet. When I shape the dough, I place it on a lightly greased foil sheet and let it rest.
I made the 5 min. read yesterday. The only complaint i have is that the crust is so hard. Any ideas on how to stop this from happening.
I’ve made this several times. I don’t put water in the oven though. Instead, I brush the top with water right before it goes in the oven. Turns out just fine every time
Can I let the basic bread dough sit on cabinet all night instead of first 2 hours.
Can you adjust this recipe for gluten free people like me? Thanks in advance irene
This is my second time making the easiest artisan bread ever! Followed the same instructions and the taste is just incredible. Just made a loaf with rosemary on top and roasted a bulb of garlic the night before and spread the paste into my loaf. LOVE!!! I want to do a roasted garlic, sun dried tomato and cheddar loaf next!! So excited by how easy this really is.
What if I don’t have a pizza stone or a silicon mat?
Wow! I just made this today and just finished my first slice. It reminds of a type of bread I ate growing up in Germany. That was formed into rolls though. Two rolls were baked so they would stick together (it resembled the number 8).W would rip them apart and share half. The outside was always crispy and the inside soft and chewy! Thank you for sharing this!
I made this once and mine turned out really salty so I’m kind of scared to try it again! I followed the directions so I don’t know what I did wrong. I’m thinking of maybe adding less salt next time. Has anyone else had this problem?
I just saw another comment about how if you used coarse salt do half of what it says above it. I will try that!
Ai, ai, ai! Don’t use Fleishman’s yeast. It is poison. It leaves a nasty aftertaste. Go for the French SAF yeast, available from King Arthur on their website. And always add something dark, like wheat germ, flaxseed, a crushed up weetabix, a bunch of bran flakes: something. You are making an investment of time and flour and it should have a fiber pay-off.
Any adjustments necessary for high altitude 3000′ ??
Twice, consistency has not allowed for formation of dough balls.
this looks like soda bread, is it the same?
Hi, I’ve been doing this method for a couple years now and recently started having issues. Ironically, Mister just bought me new measuring cups and that’s when my baking went south. Thus, I pulled out my scale and measured my cup of flour. My new cups measure four ounces, which causes a huge problem when a measured cup of flour should equal 5 ounces. I was short on my bread a whole cup. So, consider measuring your flour and see if that addresses your bread issues.
Great! Looks so easy.
I want to know what part of this only took five minutes…or does 5 minutes a day mean that’s how long it takes to make this recipe if you divide all the hours it takes by the amount of time you have left to live? Because even if you have left over dough for the next day you still have to let it sit out for 30 mins before putting it in the oven! Sounds like a good recipe but a very misleading tagline. I was very excited about a short bread recipe! Maybe the tagline should be “Artisan Bread in Five hours a Day”!
Hi, thanks for this recipe. This was the easiest bread I have ever made. We loved it. 4 ingredients and let it sit. Fantastic.
Hi everyone,
I am in the process of making the bread now and I have to say that after letting is rise for a few hours, when it was time to make the balls it was REALLY moist, my balls of dough didn’t come together nice and evenly. It seemed like it took quite a bit of flour when making the balls to get the moisture out but they never made it to the nice, smooth round balls in the pictures. I haven’t put them in the oven just yet, I will post after how it went, but any suggestions on this post would be most helpful!
Ciao for now!
nice recipe , i added olives to one batch and sun dried tomatoes to the other. Its so simple, will use this again, thanks :)
I wonder what I am doing wrong? I used bleached flour instead of unbleached. My bread came out with a very hard crust and the inside was doughy. I really want to learn to make this bread properly… Help! Thanks
Make sure you don’t forget to add the water into the oven when you’re baking. I forgot this the first time, and my bread turned out like yours did. If you didn’t forget the water, try adding a little more next time, maybe 1.5 cups. The water helps keep the outside from baking too quickly while giving the inside time enough to get done.
I made this bread. I made the three rounds. I have 2 left. My boys and husband loves it. Now my husband plans on buying me some of those “bread” items I’ve been eyeballing at the stores. Really simple. I might use some herbs we have in the garden. I love all the comments and might try some of the changes y’all are suggesting too.
I made this bread for the first time today. It came out PERFECT and my husband absolutely raved about it. I did make a change to it though. I added 1 1/2 T. of sugar and I also brushed the top with water during the last 15 min. of baking. It came out super crunchy on the outside, moist and soft on the inside. Made one long french loaf and 2 small round loaves. Thinking about adding fresh rosemary next time.
Thanks for a great quick, no fuss, no mess recipe for bread.
I’m so bummed, I have a HUGE bowl of batter, not dough after letting it rise for about 4 hours. It’s a mess. I tried adding a ton of flour and it is still super soupy. Why are only a few of us having this problem. :( I’m so sad. I guess I’ll just keep adding flour.
FYI – it worked to just add flour until it was a dough consistency. I kneaded it for a bit to work it in then let it sit for 30 minutes then popped it in the oven. The bread is wonderful. Hooray!
What if you don’t have a cooling rack? Can you set it on the pan to cool or put it somewhere else to cool? I’m sorry if it’s a dumb question. I’m not someone that bakes a lot
Hi Valerie,
You should take it off the hot pan and put it on a different surface (just be careful you don’t burn yourself!) – I’ve used a cutting board before- the wood ones- and that works fine. It takes a little longer to cool, a rack is definitely the best, but a cutting board will work for sure. Good luck!
I made a couple of loaves from the dough that was refrigerated and they both didn’t cook all the way through. Cooked it at 450 and for 30 to 40 minutes on a pizza stone….what did I do wrong? The first loaf was fine.
can you third this recipe to make only one loaf???
Do you have any tips for high altitude baking? I’m at 9000 ft.
Made this tonight. It was delicious. I had to add a bit more water to the dough because it was a bit dry. I also added some olive oil to the top before baking it. Will be making this again, definitely.
I just happened across your blog and i love your step by step recipe, its been so nice having fresh baked bread my husband and my six year old LOVE it, have some baking right now, thanks again…….p.s love your pics.
Hi I was at a loss as to how I could show my mom and step dad how grateful I am for all they have done for me this last week. (im recovering from a surprise emergency surgery) but when I came across your blog here I knew a couple loaves of home made bread was the perfect thing for my bread loving mom n dad. Thanks so much. It rising as i type and I cant wait to see how it comes out.
Thanks again!
Marisa
hi! im in the process of trying this recipe now – but i have a question. maybe it has been answered in the above comments, but i havent read them all. can you use other kinds of flour with this recipe? for instance – multiple grain flours? thanks so much!
Hi all,
So I have made this receipe many times and have experimented with many minor changes to improve the taste/texture of the bread. Here are a couple tips I can recommend/suggest:
1) Pre-heat the oven to 500 degrees prior to baking; the baking temp is still at 450, the change is only in the pre-heat temperature. I typically start the oven preheating at the same time I leave the dough to rest to insure the oven is quite hot when I am ready to bake. After the bread dough and water are in the oven turn the temperature back down to 450 degrees.
2) If other flour types are to be used, be sure to keep the ratio at no more than 0.5 non-white flour, meaning at least half of the total flour should be white or all-purpose flour. This requires a somewhat adventurous spirit as it will take some trial and error but do see the book as it has good receipes for other types of bread (wheat, rye, etc.).
3) Increase the water added to the additional pan to 1.5 cups. I have found that much more than this (>2 cups) and the texture will not be as balanced (crusty/soft) between the crust and the interior crumb. I have found there is no difference in texture if the water is below or above the bread in the oven.
4) I suggest adding some herbs or other things to the dough such as shredded asiago cheese, roasted garlic, herbs, chopped olives, sun-dried tomatoes or dried fruits for a variety of sweet or savory bread types. Be careful when adding things to the dough especially if you are using a baking stone. The oils from cheeses and other things will cook into the stone making it smoke during subsequent cookings (taste is not impacted). If this happens, just clean the stone by scrubbing it with baking soda and a little water to remove the oils and clean it for future use.
Good luck and I hope these suggestions prove useful.
Enjoy!
Mine was really salty-I add coarse sea salt. Can you cut back on the salt?
De – From what I remember with my brother telling me, if you use coarse salt, cut it in half. And sounds like that’s what it needed.
This was wonderful. So easy to make. I’m hooked now!
I have the book, so now it’s finally time to open it! Your bread looks delicious!
I’ve been making this break for quite some time! DELISH! I always need to knead in about a cup of flour after the first rising or else the dough is just toooooo sticky! Thanks!
Thanks, it was really easy. I did not believe I could make an edible bread until now. I have three loaves and they taste good. No muss, no fuss.
So would this bread be good for like stuffed French toast or even regular French toast?
It makes fabulous french toast. So good, even, that I, who normally skips b-fast, have made it like five times in the last two weeks.
It also makes amazing grilled cheese. Butter both sides, stick in a 400 degree oven for seven minutes per side and voila! Perfect grilled cheese to accompany a lovely winter soup.
they look like the ones my mother used to make on Chili night. But instead of slices, she would cut off the top and carve some of the insides out and pour chili in the center. They would make great and eddible chili bowls. I might have a new dinner to make soon.
Its a really wonderful easy recipe. My niece made it for thanksgiving and we also got some store bought rolls just in case it didn’t turn out. Everyone devoured the bread and the rolls were left uneaten.
Excellent how to presentation!! Can’t wait to try this recipe, thank so much for the encouragement by making this so easy to follow!
do you need to knead it?? my bread has been riding for about 4.5 hrs and it’s barely risen! it’s scaring me! it’s the first time I’m making bread so it’s worrying me.
I made this bread today, and it’s hands down the best bread I’ve ever had. I was a little nervous because mine was very, very sticky, but once i added just a bit more flour, it’s PERFECT. Thank you so much!
PS
When I make my bread, I slather softened butter around my ball before baking. I personally enjoy this taste rather than my non-buttered ones.
Your Brother is handsome and if he can bake/cook, oh what a catch! :-)
I have attempted this bread many times in the past 3 years. I’ve never tried adding water-I think this may be very important.
Thank you so much for sharing with us.
-Rose
Just made this bread and it was perfect! Such an easy and fast recipe!
I followed your recipe and it turned out SO delicious. I am at home sick with pneumonia and on strict bed rest orders from my doctor. I wanted something warm and delicious to so I tried this recipe. The dough was finished and back in the bowl rising before I was even tired. I popped it in the oven at around lunch time. When it was done I used it as a bread bowl for my husbands homemade chicken noodle soup. I feel better already:).
I recently got into making bread and I’ve never made it before without the sugar, whole rising and foaming bit. When I made this (tonight, in fact!) I honestly thought it was going to be really crappy because it had barely risen and the dough seemed really tough and chewy. But AS SOON as I took it out of the oven, I knew I had a winner. It was super amazing, with a lot more flavor than other breads I’ve made. I’m very impressed, and must give my sincere apology for not trusting you :)
any word on how it comes out if you only use wheat flour?
If you are talking about 100% whole wheat (ie 6 1/2 cups of w.w. and no white), you’ll need to add 5-6 T of gluten flour and adjust water to more/less because of it.
Little gluten in w.w. (actually, the bran “cuts” the gluten strands when kneading) so you’ll end of with really dense, low bricks.
The added gluten flour will greatly aid in “rise” but don’t cut the finished product with a knife. Squeeze the dough apart to get 2-3 parts. That way, you don’t cut the strands of gluten, you squeeze them out of the way and so maintain that “stretchy” quality the gluten provides.
Thank you!
I found your site yesterday and baked the bread today – it has turned out amazing! I did, however add about a teaspoon of dried rosemary to the bread and it really adds to the flavour! (I wanted a fast bread with rosemary and it worked!)
I see that the recipe makes 3 loaves but you’re only able to bake two at a time. Maybe this is a stupid question but what did you do with the third loaf while the other two were baking? Did you just put it in the fridge then pull it out to bake it after the other two were done? I wish I had a double oven but I don’t. :(
Trimble:)
I just let my set out until the other 2 were done baking and then I threw that one in the oven. Turned out just fine:)
This bread look AH-MAZ-ING!!! So easy. Now I can actually make better-than-Panera bread in my dorm room. And to your yeast comment, it’s actually easy to understand once you know yeast is a fungi. Although it’s in the same family as the mushrooms you’d put in a pasta or see growing in your yard, each yeast cell is its own organism. That’s why it looks grainy. The dry yeast is in hibernation, and adding warm water and food (the sugar) activates it. If you recall grade school science courses, fungi “breathe” in the same way we do, by taking in oxygen and expelling carbon dioxide. This is where the bubbles come from. Another thing living things do is reproduce, and that’s why the yeast rises. So each time you make this wonderful bread, it’s like a mini science experiment!
This looks delicious! Small little loaves but they look beautiful! I may have to attempt this. I’m scared of bread really, but this looks remarkably easy! :D
I’ve got the book and have been baking THE bread with varying results. I need to be consistent I think: I’ve been experimenting with different kinds of flour and using sour dough starters! I always bake right on top of a pizza stone and that is what I have a question about. My oven does not have sliding racks but it has oven trays on top of which you can put a rack. If I would put my stone on top of that (so slide in tray, put on rack and stone on that again) it would be too high up in the oven, so I put the stone on the tray that slides in. I wonder if that is a good idea and if I should put the rack on the oven floor. I asked the oven manufacturer (Toshiba), but they could not say :-(
Thank you so much for sharing this-we are hooked! I made a batch and added chopped garlic and rosemary and kosher salt on top of the loaves- delish! Today I’m making 1/2 whole wheat. If you whip it up in your stand mixer, it’s super easy! I let it mix for about 10 minutes with the dough hook and it turned out perfect. Also, I threw it right in the fridge after mixing- no problem! I have a roll recipe everyone loves that is a similar easy process. Google: Icebox butterhorns. They are incredible!! Thanks again!
SO good and REALLY easy. Best bread we have made yet!!!
Hello! Just wanted to tell you all that the dough also will be fantastic as pizza! Take a small piece, like pingisball (is it called that in English?) and shape it and then form it like a pizza and put on what topping you like! Pizza in a minute, faster than takeaway!! Love their books and their web-site, I have always a dough “living” in my fridge. Sunny greetings from Sweden!
Margareta, it’s close, in English we say ping pong ball size. We also call out pizza take out instead of takeaway. It’s really cool that you’re from Sweden and know English so well. Just looking at Swedish scares me. My great great grandparents came from Norway so I’ve always been interested in that area of the world.
Thanks for the pizza tip, that’s awesome!
I’m having the same problem as Fawn. I just mixed mine for step 2 and it’s so watery, it doesn’t look like your photo. ???
Fawn and Gina – I’m so sorry. I’m not sure what to tell you, since it was my first time baking it too. My first guess would be lower the water, test it to what you think it should feel like, even if the recipe calls for more. Or I would contact or comment over at Jeff and Zoe’s website, they answer all kinds of questions.
Good luck. I hope it works out better next time!
The amount of liquid flour can absorb depends on the humidity. It will be different every time you made bread so you really just have to adjust the amount of flour depending on how your dough comes out after mixing. I made this recipe today adn I mixed mine and let it rise for 2 1/2 hours and it was too wet so I added some flour and kneed the dough for about 2 or 3 minutes to incorporate it all and then let it rise for another hour or so and it turned out great
I must try this!!
I made this today and not sure what happened, but my dough was sooooo “soupy” it was like there wasn’t enough flour in it? I measure it all exactly too :/ It never retained a ball form, just spread out. I am supposed to knead it after dividing it?
Just read a tweet by a friend and landed here…wow…i love the idea of adding all the ingredients to the dough and letting it rise. Wonderful..am gonna bake one tomorrow :)
Made this today, and it turned out super!
I think I am going to try this. Thanks for posting.
There is nothing like homemade bread, still warm from the oven. Thanks so much for sharing!
thanks so much for sharing. my kids and I made three loaves this weekend and they turned out perfect!! question – can you freeze the dough? if so, at one point do you freeze it?
I’m not sure if you can freeze the dough, since that was my first time baking it. But I know that on Jeff and Zoe’s website, they answer all kinds of questions and I’m sure this is one of them.
Glad it went well!
Thanks for sharing. I’ve decided to bake bread this morning now! I wholeheartedly recommend Jeff and Zoe’s books. This recipe is the French boule, and it’s so versatile. I made some amazing pecan sticky buns, some garlic breadsticks, and plain crusty bread out of the same recipe. You can keep the dough in the fridge for up to two weeks, pulling off however much you need to make fresh bread every day.
I just made this bread tonight and it turned out GREAT! (and tastes very good with my homemade raspberry jam on it !)
I’ve never made bread, but this sounds totally easy and cheaper than buying a loaf from the store. I’m going to have to try it! Thanks for the step-by-step directions and pictures! Can’t wait to see how the half and half loaf turns out. I need to get that book. It’s on my wishlist. :)
I’ve always just shrugged off this “5 minute” bread, because I can put all the ingredients in my bread machine in 5 minutes!!LOL Anyways, the paddle broke in my machine, and it’s old, so there’s no replacements, and it just happens that this post come up the day I find out!! I think this was meant to be… in fact, I am going to go try it RIGHT now:)
ooooh, gotta try this!
I’ve always been afraid to make bread. I will have to try this!!! Thanks for sharing!
Could I use bread flour instead of unbleached?
Michelle – I’m not sure, as this was my first time making this bread. But head over to Jeff and Zoe’s site, as they answer all kinds of questions like this. My initial reaction is yes, I’m sure it would be fine.
I used bread flour and it turned out fine. I think it might make it a little bit more dense, but it tastes awesome.
Yum! This looks so good, and super easy! can’t wait to try it!
so fun to meet you at evo btw. you are just as cute and sweet IRL. xo
A couple of side notes:
– Ramon said that he often uses fine salt, so he decreases the salt to 1 1/4 tablespoons.
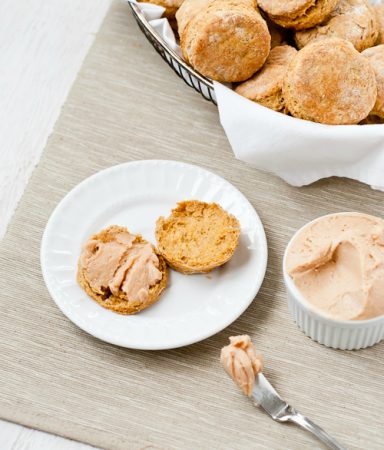
– We used on of the portions of bread to fry up some scones. They were delicious! So this bread recipe has multiple uses!
This sounds great! At what step can you put the dough in the fridge?
Once you’ve let it rise for a couple of hours, you should be able to keep it in the fridge for up to two weeks.
Isn’t this bread great?? I’ve been making it for a couple years now -so easy, so yummy. Re: incorporating whole wheat flour – you should definitely get the books if you haven’t already. The first one (Artisan Bread in 5 minutes a day) has many recipes that incorporate whole grain flour, and the second book (Healthy Bread in 5) has tons more.
Also, their blog is fantastic – they answer every question that people ask in the Comments. I think I’m in love with them too! ;-)
I am doing this tomorrow on my lunch break, should be ready for dinner. Thanks!
I love to bake but have never ventured into the breads! I think I’m going to use this recipe and try it soon! Thanks!
The receptionist where I take therapy just shared this exact recipe with me — love the taste of it!
Wow, I just got this book from the library this week and have been making this bread myself! I have to say, as a bread-aholic, this no-fuss recipe has me really excited, and I cannot wait to try some of the other goodies in this book, like challah and brioche!