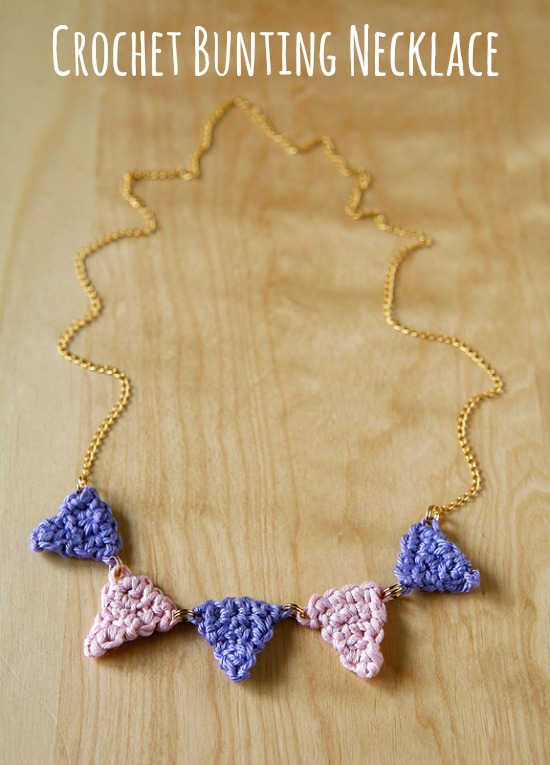
For today’s Crochet-A-Day series post, I have the lovely Erica from Caught on a Whim sharing a guest post for her Crochet Bunting Necklace tutorial. It’s too cute!

Crochet-A-Day: Crochet Bunting Necklace
Guest post by Erica of Caught on a Whim
One of the things I love most about crochet is how easy it is to make unique and stylish accessories. This sweet bunting necklace uses only a couple crochet stitches and can be made in no time at all. That means you can easily make a few of these gems for yourself, and even some more to give as thoughtful gifts!
Ready to get started? Here’s the how-to…
Supplies:
- sport weight yarn in your favorite colors. I used a 100% mercerized cotton yarn by Patons called Grace.
- size E/3.5 mm crochet hook
- chain for necklace
- jewelry jump rings
- jump ring tool or needle nose pliers
Alright, now that you have what you need, let’s get crocheting! We’ll start by making tiny crochet triangles.
Here’s the pattern:
Row 1: Chain 5.

Row 2: Single crochet in second chain from hook and each remaining chain across for a total of 4 single crochet stitches. Chain 1. Turn.

Row 3. Single crochet in the first two stitches. Next, you will do a single crochet decrease. To make the decrease, insert your hook in the next stitch and pull the yarn through, there will be two loops on your hook. Do not pull the yarn through those loops yet. Insert your hook into the last stitch and pull the yarn through once again. You will have three loops on your hook spanning the last two stitches of the previous row.

Now, pull the yarn through all three loops. This is what this row will look like completed. There are now three stitches in this row, two single crochets and one single crochet decrease. So, you’ve decreased the length of the row by one.

Chain 1 and turn. You’ll continue each of the next rows similar to the previous row, by decreasing the number of stitches by one every time:
Row 4: Single crochet in first stitch. Single crochet decrease. Chain 1. Turn.
Row 5: Single crochet decrease. Chain 1. Turn.
Row 6: Single crochet.
That’s it! You now have a triangle on the end of your hook that looks like this:

To finish the triangle, just fasten off the yarn and weave in the ends.
Make a few triangles, then link the triangles with metal jump rings using a jump ring tool or needle nose pliers. Attach them to a chain to turn them into a fun bunting necklace…

Ta-dah! Now you have a stylish crochet necklace that you can make in no time at all. Pretty easy, huh?! You can really personalize this necklace by playing with different colors of yarn and even adding embellishments such as beads to the pendants if you like! There are lots of ways to give this project a personal touch.
Happy crocheting!
 Erica is a self-proclaimed craft-a-holic who enjoys sewing, crochet and all things crafty! When she’s not buried under yarn or covered in glitter, she enjoys playing with her two mischievous puppies, experimenting in her kitchen and exploring the great outdoors with her husband. Be sure to drop by her blog, Caught On A Whim, to follow along on all of her crafty adventures!


Amazing, thanks a lot for sharing!!!