Every year when Easter comes around, we get ready to start coloring eggs. My kids love it, but I tend to get a little pit in my stomach at the thought of the mess and stain of fingers or clothing. So I’ve come up with 3 simple tips helping our egg dying experience go much smoother.
3 Simple Tips for Coloring Eggs

Tip #1: Gather Supplies
Every activity always goes better if the supplies are out and ready. You’ll need your dye (we use the store bought packages), water, bowls, drying trays (aka empty egg carton), paper towels, spoons, tongs, and hard boiled eggs. See here for a great way to hard boil eggs.
Tip #2: Cover, Cover, Cover
You’ll want to cover everything, including tables, children, and yourself. I put my children in old t-shirts of mine or my husbands. That way, they are covered up and down. I also cover the surface I’m working with. Newspaper is a good cover, a vinyl table cloth, or paper towels. I even use painter’s tape to keep it in place, as newspaper tends to move around as you go.
Tip #3: Bowls and Tongs
When using bowls for coloring eggs, I say the bigger the better. If you use an 8 oz. bowl for a recipe that gets filled to the top, add an egg in there and you’ll be sure to get a few spills. I like to use big ice cream bowls, that way there’s a little wiggle room for an extra egg or two.
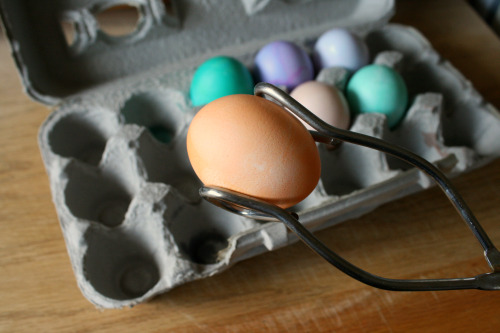
To help get those colored eggs out of the bowl, I use a good pair of salad tongs, not the flimsy wire handle provided. Get the kind of tongs that have large mouths for grabbing, but not too big, as the kids need to be able to handle them. Pictured below is what I use, basic tongs, or these crocodile tongs are fun and have nice egg grabbing teeth!

I hope these tips help you the next time you color eggs with your kids. It’s a fun memory for the family and can easily be done with less mess!


Saw this idea in a Family Fun magazine – pop each egg inside a wire whisk then dip in the dye!
Christy – Yes, good call about the floor!! Maybe Tia’s idea above is best, to do this outside!!
Don’t forget about the floor. Never worried about my kids with a wood table and floor in our dining room, but then we went to great grandma’s house and guess what happened? An entire cup of dye on her white carpet. There was much bleaching and gnashing of teeth and boy did I feel awful. Generally, it’s a lot of fun for all ages, though!
Great ideas, thanks so much. I’ve avoided the whole egg-decorating thing for the past few years for this very reason. Now that the oldest is 4.5….well, I think we have to just do it this year!
Thanks for the great tips. I love the idea of using the salad tongs to get the eggs out. Thanks for sharing.
Is it Easter time already?!?!? This year is flying by. I’m so excited about Easter this year, though. Katie is two years old and ready for her very first Easter egg hunt! This has always been one of my all-time favorite holidays.
We always used mugs to hold the dye. Always had plenty of room for the egg :)
I do all our easter egg dying outside! If you live in warmer climates that is really convenient…..if you don’t, magic eraser is also a nice one to have around! A table spoon of oil in the containers help give the eggs that tie-dyed look!
Now who doesn’t love these fun holiday traditions? These tips sound good – preparation is always key, isn’t it? I ran across a new idea for Easter Egg dying at this fun blog:
http://gingerbreadsnowflakes.com/node/158
She colors her eggs with kool aid!
I love dyeing eggs with old silk ties! They must be 100% silk. Find some old ties with cool patterns on them and deconstruct them. Cut the silk up into pieces that will wrap around the eggs sufficiently. Take UNCOOKED eggs, wrap the silk around them and secure it with a twist tie. Take a piece of muslin or old sheet cut into squares and wrap that over the silk-wrapped egg. Secure with another twist tie. Begin to boil your water, and add a few tablespoons of vinegar to it. Put your eggs in the water and boil them for about 20-30 minutes. Cool eggs and unwrap them. You will have the most wondrous looking eggs around! Coat them lightly with a bit of vegetable oil to make them shine. Enjoy!