You guys!! I’m so excited to share my finished granny square blanket with you. It’s been such a fun project to complete. I am so happy to partner on this project with Lion Brand Yarn. Me and Vanna go way back ;) It was a perfect match up!
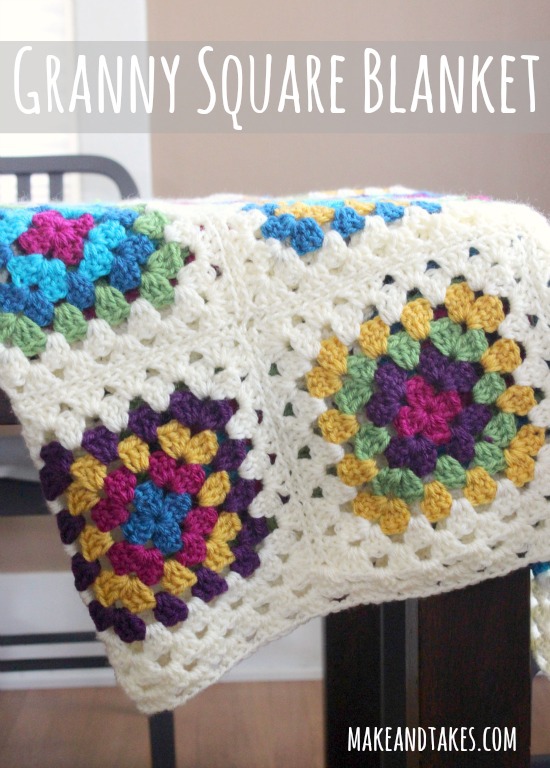
I’ve talked about crocheting granny squares before, but I wanted to dive into changing colors for each layer and stitching squares together to form a blanket. I’m calling this my lapghan, as it’s perfect for a lap. But we could also call it a granny patch blanket, as it was fun to bring in a quilting aspect to this blanket as I patched the pieces together. It was my love of quilting mixed with crochet.
Crafter heaven!!
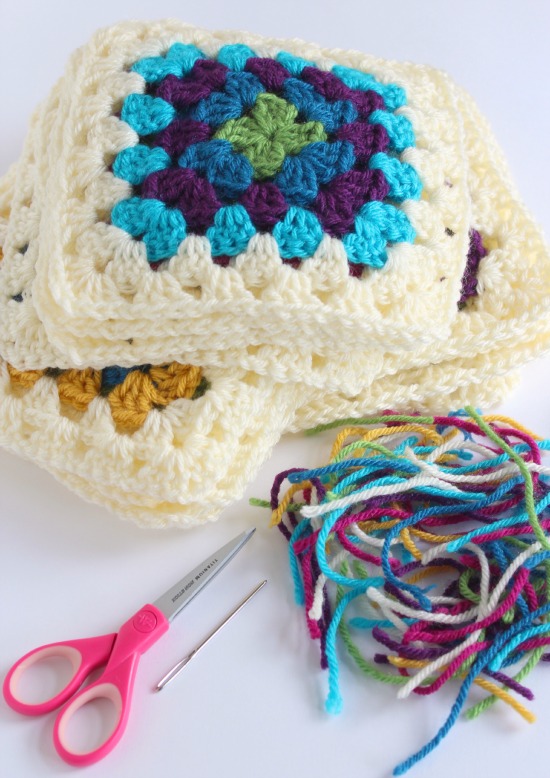
Here is what you need to make this Granny Square Blanket:
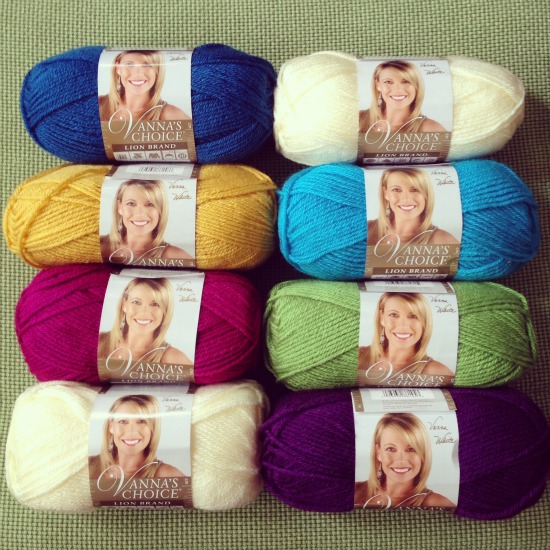
- yarn (3.5 oz, 170 yd)
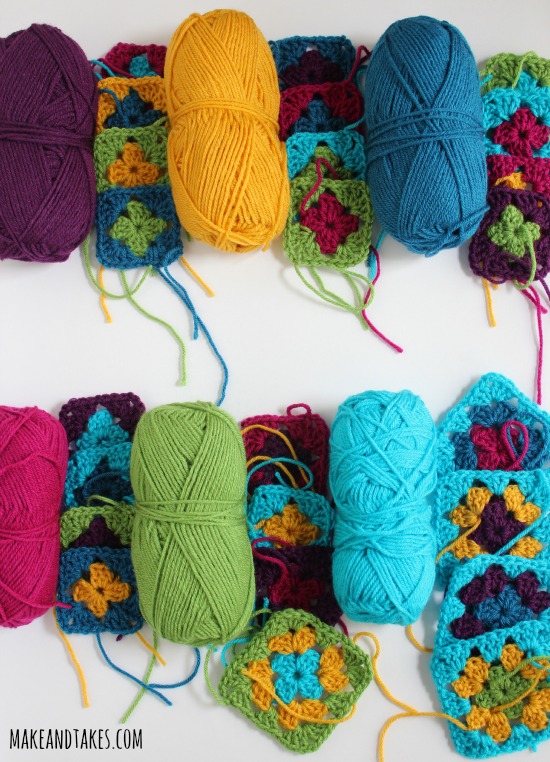
4 skeins of cream, 1 skein each of 6 colors: purple, dark blue, green, berry, yellow, aqua - crochet hook I
- crochet needle
- scissors
** I’ve shared this before, but watch this video for a great tutorial on a basic granny square:
http://youtu.be/79zZJjXRfSM
When I was done crocheting each color in a row, I finished off the row by pulling the yarn through tight. Keep reading for how I crocheted it all together!
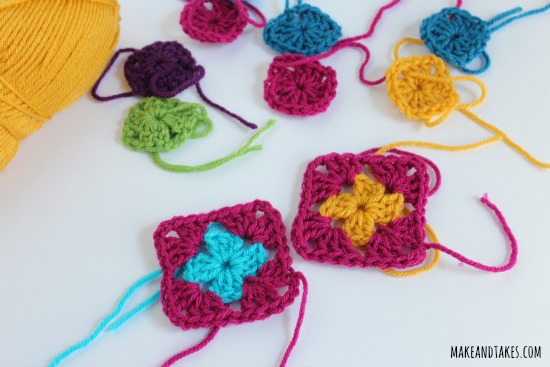
To add on another color, make a slip knot over your hook and pull it through one of the spaces on your previous row. Chain 3, double crochet 2, chain 1, and then continue around your square. Do this for each color. I found making each of the squares was pretty quick work.
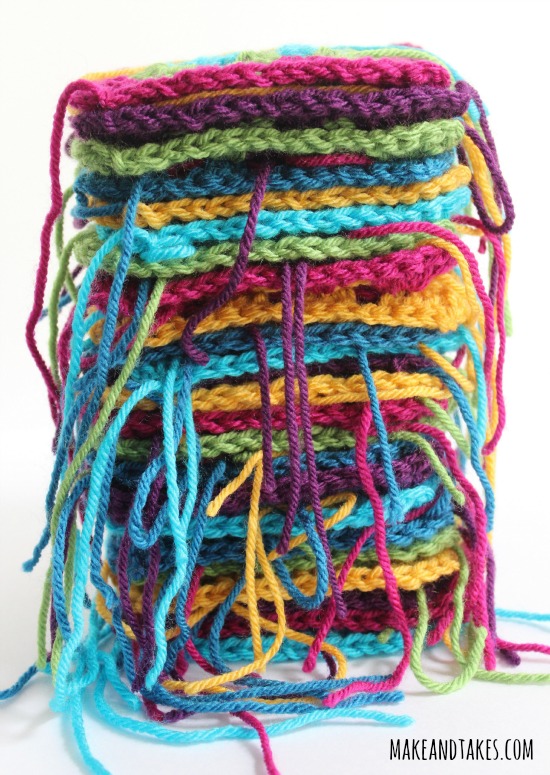
I waited to hide all my tails in until the end. That almost took more time than the actual crocheting. But I put on a movie and got to work! Thread each of the tails with your crochet hook and stitch them back through the yarn to hide. Cut off any extra yarn.
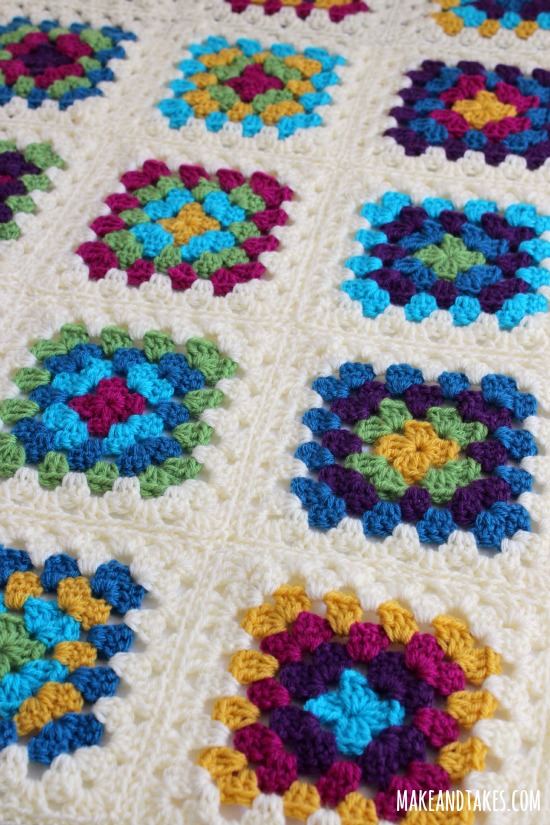
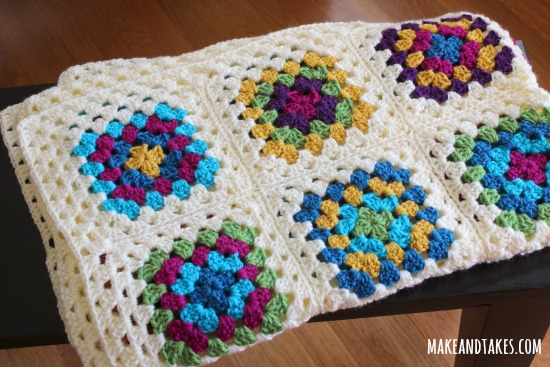
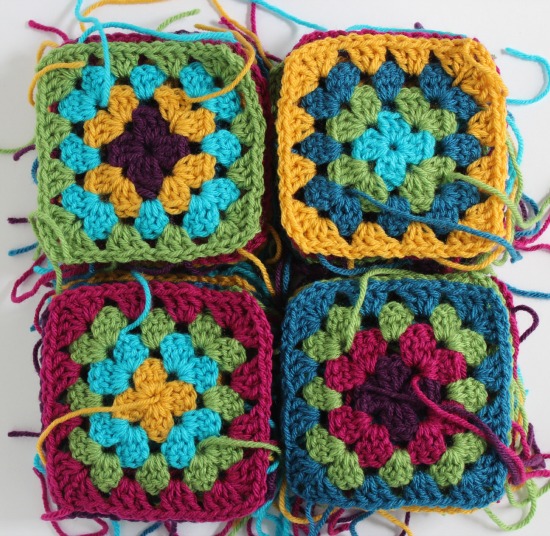
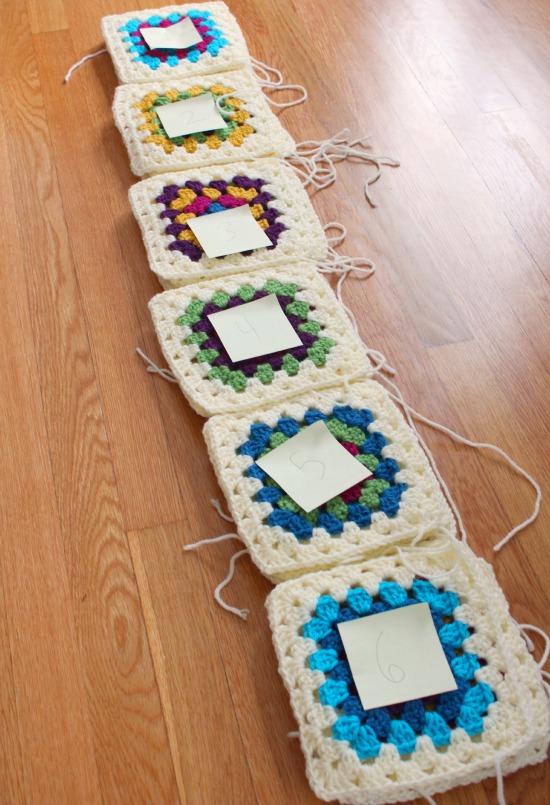
Now comes the fun part, patching it together. Once I had each of my 24 squares complete, I laid them on the floor and started to patch them together. I had my little helper with me. We were checking to make sure the centers and 4th rows of each square were not the same colors next to each other.

I placed a post-it note onto each of the rows to remember which came first, I had a photo of it in case anything got mixed up, and piled them together.
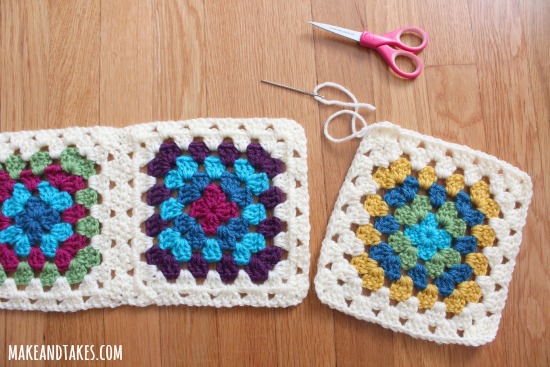
For stitching up each of the squares to form the blanket, there are a few ways you can do this. It all depends on the look you’d like it to have in the end.
- Join as you go method by The Green Dragonfly – making one extra row on one side.
- Flat front seam method by Very Pink – watch the video, the last 5 minutes.
- Single crochet method by According to Matt – for a raised seam look.
- Double crochet method by Carina’s Craft Blog – makes an extra border in between each square.
- Hidden whipstitch method by Lion Brand Yarn – makes for a seamless look.
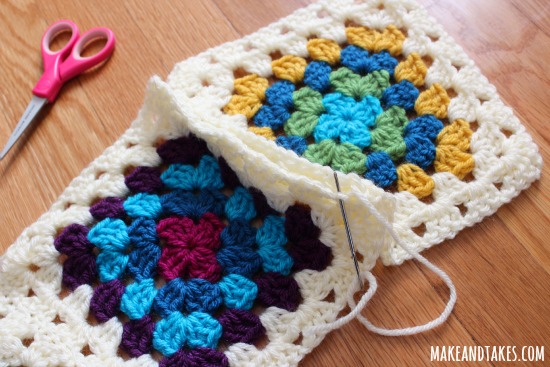
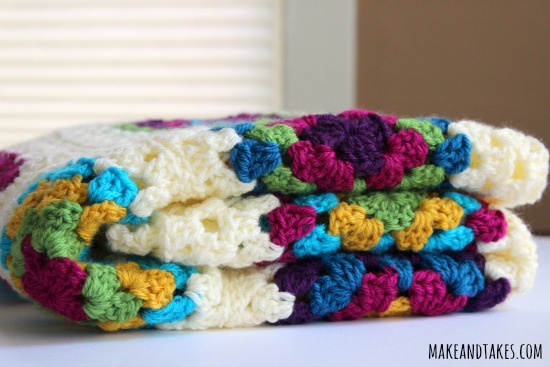
I used the hidden whipstitch seam method. Here’s a great graphic photo from Lion Brand.
This was super simple to do. Thread your crochet hook onto your yarn. You’ll need the length of yarn as long as your squares. Whipstitch through the back V loop on each crochet stitch, pulling the yarn tight as you go, about every 15-20 stitches. Once your yarn is all the way through the square at the end, pull it tight once again. Tie it off, cut the end, and hide in your tail.
Do this for each square in the row. And again for each row in the blanket.
Once you’ve hidden all your tails from joining squares, you can be finished there. But I chose to add 2 more rows of double crochets all around the blanket for a border. It helped make it a little bigger and finished off the piece. I could even add on a few more rows later, if I feel like I want a litte more color or thickness to it.
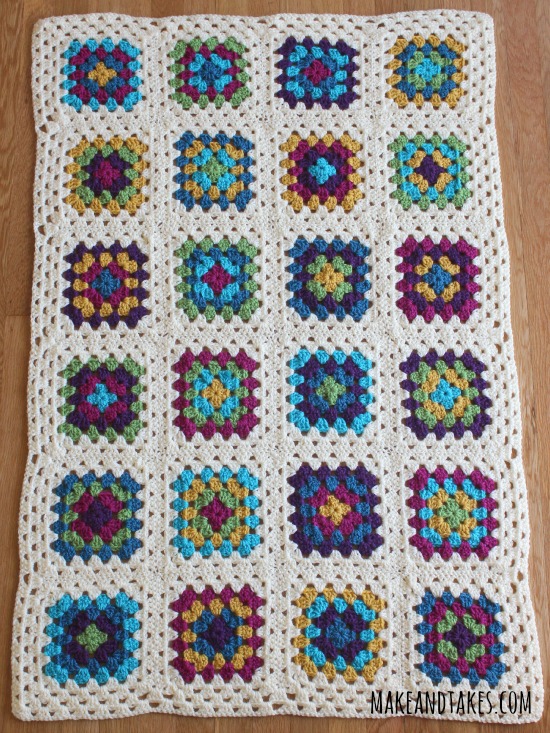
Tada!! I’m done. I love it. And we’ve been snuggling in it all week! I really hope this helps to inspire you to crochet, making a granny blanket of your own. There are so many fun ways to do this and you’ll love the result!
Thanks again to Lion Brand Yarn for sponsoring this project. Find them on facebook, twitter, and pinterest for yarn project inspiration!


Very nice but we’re is the pattern
I love the colors you chose for this blanket! I am planning on trying this pattern myself, but I’m having trouble matching the colors you used with the Vanna’s Choice colors available online. Could you tell me the exact colors of that you used? For example, I am unable to find cream, dark blue, or green in Vanna’s Choice. There are lots of greens and blues to choose from, but none have those exact names. If you could post the exact colors of the yarn you used, that would be so helpful. I can’t wait to get started on the blanket. Thanks!
Here are the color choices we used:
Magenta, Aqua, Sapphire, Lime, Eggplant and Mustard.
The off white was “Lamb” in Vanna’s Choice Baby.
I need to share this with my 25 yo daughter, she just learned to crochet earlier this year!
I love, love, LOVE the colors in this blanket!!
Oh my goodness ~ too cute!!!
I love granny squares ‘n I really NEED to learn this technique!!
Thank you thank you!! Beautifully done-so much so that I’ve begun a blanket here. Did you use a size J hook? I’m finding it to be a little looser than maybe I’d like it to be.
Thank you so much! Such encouraging words! For the hook I used a size I. I felt like that was a good thickness and tension.
This is beautiful and caught my eye immediately! I am looking for a project for a wedding gift. The bride has requested an afghan she can use on the bed in their guest room. It would need to be larger than the lapghan size pictured here. What size were each of your squares?
Thanks!
Thank you! It was a fun one. Each of the finished squares was 7 1/2 inches. The whole blanket measured 30-1/2 x 47 inches. I hope that helps.
Absolutely lovely!! Granny squares are so much fun making and you can everything with them!
Thanks for sharing!
My grandmother taught me to crochet when I was about 8 or 9. I’ve always loved it but haven’t made much time for it lately. Your beautiful blanket is inspiring me to get those hooks and yarn out!
It’s beautiful Marie! I started crocheting in high school and then put it down. Never did pick it up again. Maybe some day!
LOVE these colors!! Might just borrow this idea & finally make that couch blanket hubby’s been after me to make since I started crocheting back in 2009. Your blanket is beautiful, thanks for sharing.
It’s beautiful.. well done!
You never cease to amaze me! Nice work, you crochet expert!
Way to go! It looks beautiful. I’m so impressed with your dedication… I need more patience ;)
Looks amazing! I have always wanted to make one but they look so daunting! Approx how long did this take you to make?
Is it acrylic?
LOVE the color choices!
Yes, Vanna’s Choice is acrylic.
It’s sort of hard to say how long it took, as I stopped and started a few times over 2 months. If I kept up with it, I could have had it done in a week or two. It does seem daunting, but really, I love it so much and feel quite an accomplishment! It was all the yarn tails that took the most time. But I loved making the small squares, as well as the whipstitching.
The best is to get a audiobook and it goes by in a flash!
It’s lovely! You’re inspiring me to finish my granny square-like afghan! Mine is circles, though. I think the pattern is called Flowers in the Snow. The colors you chose are so pretty.
Thanks, Cindy! And I bet your circles blanket will be gorgeous! I want to make that pattern next.