Looking for a great inside summer activity to do with your grade-schoolers, tweens and teens? Stamp-carving is a great activity for kids of all ages and stages, and a good one to have in mind in case of a rainy summer day (or on days when it’s too hot to go outside!) Older kids can carve their own stamps, and kids who are too young can illustrate stamps for you to carve.
You can find all the (cheap!) supplies you need for making your own custom stamps at the dollar store or in the school supply aisle of any store. Carving stamps need not be dangerous to little fingers if you use the metal eraser-holding part of a pencil instead of carving tools, and an eraser for the carving surface. A homemade carving tool is a lot safer for kids, and quite a bit cheaper than buying legit printmaking tools.
This is a great entry-level project for stamp-carving, or would be great for kids with a bit of supervision. It’s also a great spur-of-the-moment craft to do in a moment of boredom, say in class or at work (on your coffee break!). It’s also a super-quick craft, and can take as little as ten minutes to complete. You can use the stamps to adorn all kinds of things, from papery things like notecards and stationery, to fabric (with fabric paint), or just about anything else you can think of! Stamp-carving is a very valuable crafty skill to learn.
Project Estimate:
- Erasers, $1 or on hand
- Pencils with metal eraser-holders, $1 or on hand
- Pencil to write with, on hand
- Black permanent marker, on hand
- Stamp pad, ink, or paint to make prints with, on hand or $1
Total cost: FREE to $3
To make the tool:
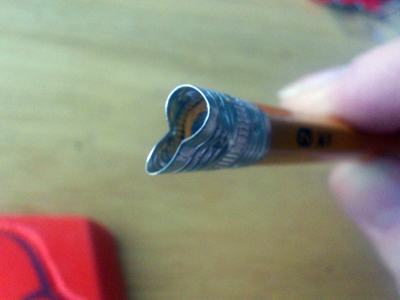
To make the pencil carving tool, pull out the eraser, and bend the metal to the desired shape. I just pinched this one here to make a two-sided carving tool – a thinner side for finer work, and a wider side for removing big sections of carving material.
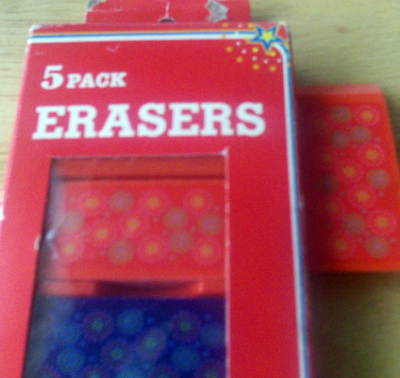
You can pick up erasers of different sizes and shapes at the dollar store. I just used standard school-sized erasers for this particular project.
Designing the Stamp
To make the design for your stamp you have two options.
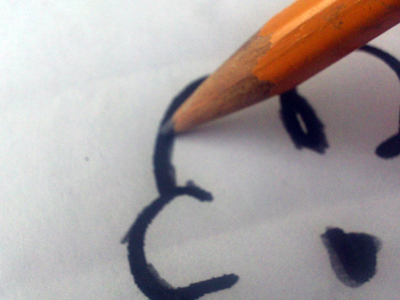
Option #1: Draw design directly on the eraser and then carve. You can draw with pencil and then go over it with a black permanent marker.
Option #2: Print out a design and transfer it to the eraser. To transfer the design, color over the black parts of your printed out design with a pencil (thickly), and then turn paper design-side down on your eraser. Burnish (rub hard with a hard tool like a spoon or coin) the back of the paper. When you lift the paper, you will see the design transferred to the eraser. You will want to go over the design with a black permanent marker.
Tip: When I carve stamps, I imagine that the image I am drawing is what the final stamp will look like. Any parts that I color black, I do not carve. These will be the parts that end up making the imprint. (Of course, the actual stamp will vary from your initial drawing – for one, it will be reversed, and it will morph a bit just based on the process of stamp-making. Also, using these cheaper materials will make a cruder stamp.)
If you are carving words, letters, numbers, or symbols, remember that you need to reverse them when you are planning out your design. If you carve a regular R on a stamp, it will end up looking like a backwards R.
Don’t include too many fine details – especially for these stamps. Your tools are crude, so you won’t get a super-high level of detail.
Carving the Stamp:
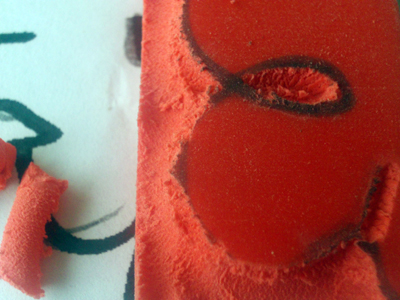
Your design is drawn on the stamp, so you’re ready to carve. Carve away all the parts that aren’t colored black. Be sure to leave anything that’s colored black to assure you get the image you planned out.
Safety rules (go over these with kids):
- The eraser-carvers really aren’t dangerous, but do remember to always carve away from yourself. This is an important habit to get into in case you eventually move on to higher-quality tools.
- Keep your fingers out of the way of the carving tool.
You will want to experiment with depths of carving to see how deeply to carve away the eraser. The deeper the carving, the less the chance that ink will somehow transfer from it. If you want a sketchier look, carve shallow cuts. Remember, it’s always better to carve less because you can always go back and carve more (but you can’t replace the carving medium once it’s carved away!).
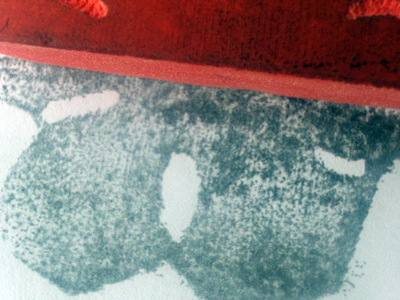
Check your carved stamp with a stamp pad or paint, and make any adjustments. For instance, some areas might not be carved deeply enough and might leave artifacts on your stamped surface.
Heather Mann is a regular contributor at Make and Takes. She’s is the mother of two boys under age 3, and another boy on the way. She publishes Dollar Store Crafts, a daily blog devoted to hip crafting at dollar store prices, CROQ Zine, a print magazine devoted to hip crafting, and also CraftFail, a community blog that encourages crafters to share their not-so-successful craft attempts.


Very cool,
what a fantastic idea! like Julie, my little one wants to linocut with me, this could be the perfect outlet for him.
Great idea, I look forward to your other posts on this blog!
Great idea! I’ll have to try this w/ my kids – they’ve wanted to join in on my linocut printing, but I haven’t let them due to the sharp tools. This will be perfect!
Wonderful idea!
Thanks for the tip ;)
Thank you for the tip it sounds grate!
EWian