Hopefully some of you have tried your hand at crochet over the last few days, picking yarn, choosing a hook, and learning some stitches. If so, you’re almost ready to finish up your project. There are a few things to know as you finish it up and make it look all pretty and perfect. Because if you are like me, my first several projects came out all wonky and needed a little help to make them pretty and perfect. There’s a few things you can do to kind of fake it… fake it til’ you make it!

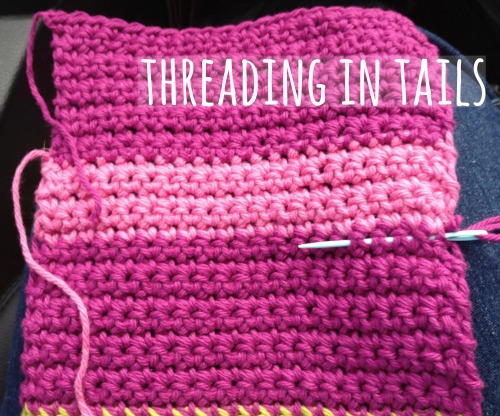
1. Hiding the tail: When you start and finish your project, you have little 3-4 inch yarn “tails” sticking out. I always wondered what crocheters did to hide those pesky little tails. It’s almost like hiding tails in a basic sewing project, making pillows, you thread it back through your piece and it will magically disappear!

Watch this video as she shows how to hide a tail. It’s a beginner’s video and she demonstrates how to hide your tail at the end of the video. You can use a large plastic crochet needle to weave it through as I did above, which is the easiest way, or simply use your crochet hook to weave it through. Note: If you have a needle, it threads through the yarn much faster.
http://youtu.be/VXVTSphiYVM
http://youtu.be/1GZTuJSJsk8
- When your project is done, tails hidden, you can simply stretch your yarn in all directions to lock your stitches in place. It’s a quick fix, but be aware that it’s not ideal.
- Steam or Wet blocking: see this article from Knit Simple Mag or this one from Michael’s Crafts for how to wet or steam block your project.
- Read this article from Doris Crochet – Blocking: Just do it! She has pictures that show the difference over time of blocking and not blocking. Here’s her method of blocking as well.
4. Now what? So you’ve made your project and it’s all finished up. Now what? What are you going to do with all those washcloths and scarves? Because you’re addicted, right? I knew you would be!
Plan to give some to your friends and share the love. They’ll love to get something handmade from you. Or you can perfect your stitches as you do small projects and make 16×16 inch blankets, donating them to Teeny Tears, I’m sure they would LOVE your donations!
Have you been crocheting? What projects are you making? Share your links to your projects if you have them!


Please teach me! Meema’s mom was a master at crocheting. So was her grandma. I’m adding, learning to crochet, to my bucket list!