Piecing is the part of the quilt-making process where you sew the pieces of the patchwork together.
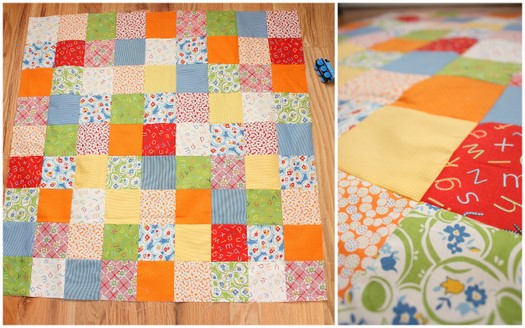
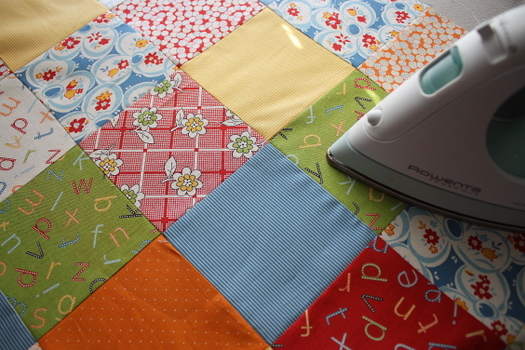
With a pattern of simple squares we are mainly playing with the fabric design to get the look that we want. There are lots of options here: alternating lights and darks, diagonal rows by colors, etc. There’s no right or wrong – just personal preferences. For this project I chose to go ‘scrappy’ – meaning there’s no rhyme or reason to how I laid it out other than I just liked the way it looked – and I tried to balance the solids, prints and colors. (If you’re eagle-eyed you may notice I changed my layout a little from a couple of weeks ago. You can read more about the change here.)
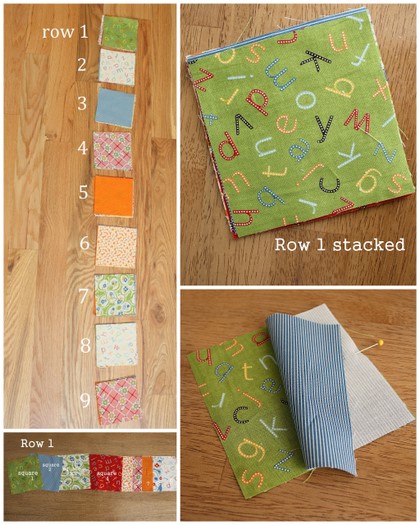
1. Lay out the 81 squares in 9 rows of 9 squares each. (If you are working with the pre-cut Charm Packs you will need 64 squares laid out 8 x 8.) Stack the squares in each row, starting left to right, on top of each other. I suggest labeling your rows by number to help you keep track of them. Use a piece of tape with a number, chalk, anything easy to help remember which row goes where.
2. Take the top square (square 1) and lay it face up. Pick-up the square 2 and lay it face down on top of square 1, then pin the right sides together.
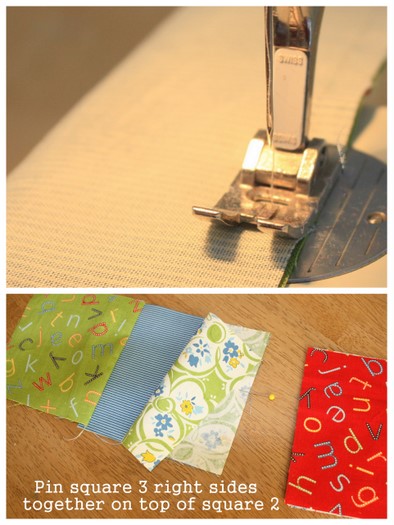
3. Bring the paired-up squares to the machine. Sew the squares together with a ¼” seam allowance. This usually means lining up the edge of the fabric with your presser-foot. (Some feet are a little wider than ¼”. You can sometimes adjust the needle to help. A scant ¼” is better than a wide ¼”.)
***This is the part where I can’t stress enough the importance of using a consistent seam allowance. It’s the key to good looking piecing. Always keep the edge of your fabric lined-up with your presser foot.***
4. Now open up that pair and pin square 3 facing square 2. Sew a ¼” seam. Repeat for the next 5 squares and for rows 2-8.
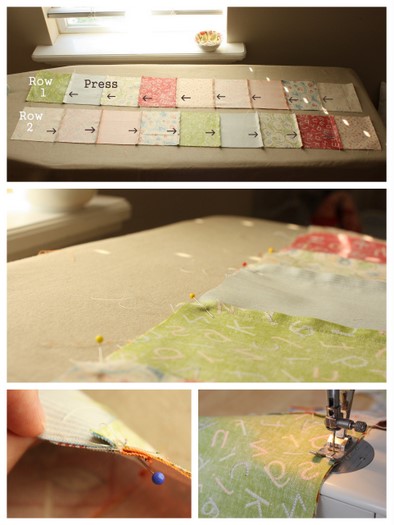
5. You will want to press your fabric here. Pressing may seam tedious, but it really makes a difference in how your quilt turns out. (There’s a difference between pressing and ironing. Pressing is a little more gentle. Using some steam can make things crisp.) For this project we are going to press our seams to one side – not open.
Alternate directions the seams are pressed for odd and even rows. (See top photo just above.) This illustration shows rows 1 and 2 with seams pressed alternating directions. Continue to do that in the rows that follow.
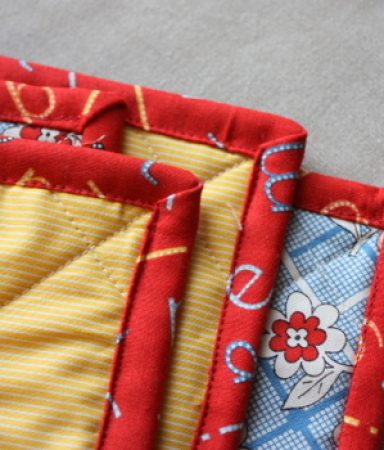
6. Place the two rows facing each other, matching up seams. The pressed seams should butt up against each other. Pinning at the seams will help the square points to match up.
7. Repeat this process to sew all the rows together and then press the pieced part of the quilt. Hopefully things will line up neatly. All of this – pressing, getting used to a consistent seam allowance especially – will take getting used to and I promise it gets easier and more natural the more you do it.
Now, don’t have a panic attack if some points are not perfect. Promise? Especially if this is your first quilt. The final quilting will help hide some of those flaws later.
Up next Tuesday in our Quilt Along Series: Adding the border.
***Some things I forgot to add about borders and bindings: I am using different fabrics for my border and binding (in my case yellow pin stripe for borders and red alphabet print for binding), but you could use the same fabrics if you want. For this quilt I would go with a smaller print or solid for borders to frame the patchwork part of the quilt -especially if the squares are busy. Also keep in mind that the border fabric will become the dominant color of the quilt so go with the color you like best. See you next week!
 Amy Smart likes her family, fall, and fish tacos. She blogs about making quilting cool at Diary of a Quilter.


Taking a picture really helps with remembering the patter you chose and which rows are which.
Having a little trouble visualizing this step….6.Place the two rows facing each other, matching up seams. The pressed seams should butt up against each other. Pinning at the seams will help the square points to match up.
When you say facing each other do you mean on the nice print side? Yes, I am very sewing challenged. After you sew the rows together, do you pin all the seams of every row and then sew? Or do you sew as you go after each row? I think its the latter. I’m just trying to get a visual in my head before I start– if I had the rows and could experiment, I could probably get this!! BTW– I just bought my first sewing machine.
Having a little trouble visualizing this step….6.Place the two rows facing each other, matching up seams. The pressed seams should butt up against each other. Pinning at the seams will help the square points to match up.
When you say facing each other do you mean on the nice print side? Yes, I am very sewing challenged. After you sew the rows together, do you pin all the seams of every row and then sew? Or do you sew as you go after each row? I think its the latter. I’m just trying to get a visual in my head before I start– if I had the rows and could experiment, I could probably get this!! BTW– I just bought my first sewing machine and don’t really know what I am doing BUT really want to try this quilt. And these directions seem to be very clear and descriptive. I’m just stuck on this little part in my mind. THanks!
this is perfect, amy! thanks a million for sharing your expertise. and i was glad to read about the zinger fabric, too.
I love Amy! What great quilting tips for the *ahem* quilting-ly challenged.
Good idea to number your rows with tape and a #. Mine seem to get all mixed up and I forget what order I had them in!!
I’m getting ready to attempt my first quilt – – good to know about the press-to-the-side thing, because I would just press open!