When looking for a quilt design, there are a myriad of quilt pattern options to choose from. That can be a little overwhelming. Here are a few basics that might help.
Most quilting patterns have some things in common: A list of fabric requirements and directions for cutting the fabric, assembling the pieces, and laying out the quilt.
Some tips to consider when working with most quilt patterns:
- It’s a good idea to read the pattern all the way through before you start cutting into your fabric or sewing – helps to get ‘the big picture’ of the project.
- Some patterns give experience levels such as Beginner, Intermediate and Advanced. Start with something simple for your first projects and save the more advanced designs after you’ve gained some confidence. Saves some possible frustration.
- Patterns can be found individually packaged, in books, magazines or online. ModaBakeShop.com and FreeQuiltPatterns.info among others are great resources for free quilt patterns and tutorials.
One of the fun aspects of quilting is coming up with your own design. Some things to consider:
- Graph paper and a ruler are helpful tools.
- Keep in mind the basic rule of quilting: always sew with a ¼” seam allowance. (This might seem really small if you are used to sewing clothes.) Therefore, you need to add that seam allowance on to all four sides of your shape.
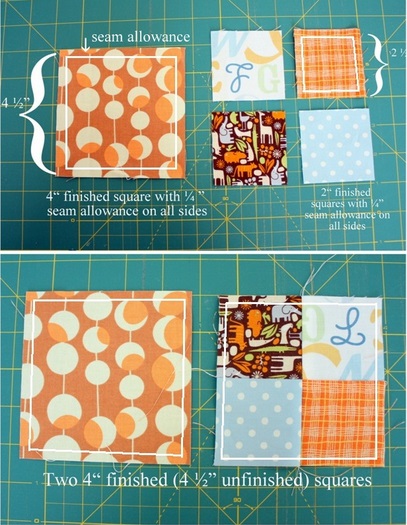
For example, if you want to make a quilt out of 4” squares, you need to allow ¼” of fabric on all sides of the square for the seam allowance. This means you need to cut a 4 ½” square. If you want to create a 4” block out of four different squares you want four 2”finished squares, which means you will need four 2 ½” squares. This will create an unfinished block at 4 ½” and a finished block at 4”.
Yes, quilting does require math. (See? Your elementary school teacher was right!) I look at it as a way to keep my brain from total atrophy and an effort to stave-off Alzheimers.
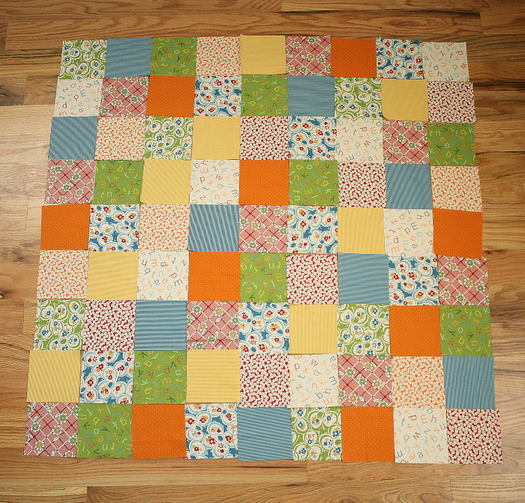
For this project, as we continue on our Quilt Along, we are going to make a baby quilt measuring 42″ x 42″ using 81 4″ squares with 3″ wide borders on all sides. Therefore we are going to cut 81 4½”squares. The quilt will be laid out 9 x 9 squares.
Fabric requirements are:
- nine 1/8th yard pieces for blocks
Most stores will cut 1/8th yard pieces, but not all. Might be a good idea to ask first. I am using 10 different fabrics because I want two prints in each color, so I’m getting ten 1/8th yard pieces. Because I’m nerdy like that. If it’s easier, you can use 5 ¼ yard pieces. Just depends how many different fabrics you want in your quilt.
- ½ yard for border
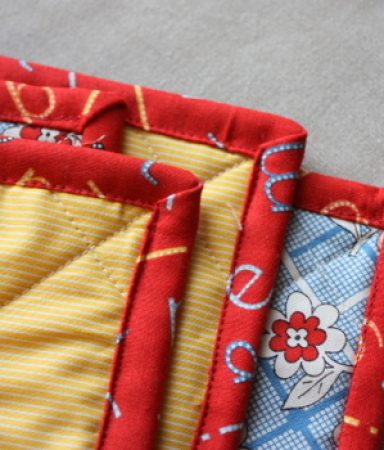
- 3/8 yard for binding (this is the outside edge that finishes the quilt)
- 1 ¼ yards for back
[If you choose to use Charm Packs instead of cutting your own fabric squares: these squares come pre-cut at 5″. You will need 2 Charm Packs. You can either cut them down to 4 ½” squares and use 81 squares like the quilt above, or you can leave them at 5″ and will only need 64 squares for a quilt layout of 8 x 8 squares. Either option works. Everything else will be the same: sewing, borders, quilting, etc.]
Up next Tuesday in our Quilt Along Series: Cutting Fabric
 Amy Smart is a wife and mom. During her spare time she likes to cut up fabric into small pieces and sew them back together. She blogs about her fabric addiction at Diary of a Quilter. She also likes to do lots of other things that she doesn’t blog about like: watch Masterpiece Theater, eat homegrown tomatoes, and wear flip-flops.


OMG – I am in love with your tutorials, your blog and how EASY you are making the prospect of me designing a quilt on my own. I have SO much fabric I have bought because I like the pack or the combo of colours and have dilly dallyed at taking my rotary cutter to them because I had no idea where to start! If you have a book tell me, I will buy it and one for all my crafty friends :-)
Happy New Year to you and thank you for making mine happy so far! (now, back to your blog…)
Thank you so much for taking the time to do this series! I’ve always wanted to learn and this has been simple and easy to follow! Thanks again!
Such good tips. I always forget to allow for that 1/4 inch seam and my quilt ends up being smaller than I originally thought. Great pictures!
Great tips! Thank you so much! :D I am loving this series so far! :D Yes, this is a wonderful first project! :) I LOVE the Moda bakeshop blog! ;) Visit every day! :D
Blessings!
~Miss Rachel~
Love these! I might just have to start a new project! :)
Thanks! I can’t wait to start sewing. Thanks for explaining in such an easy to follow way!