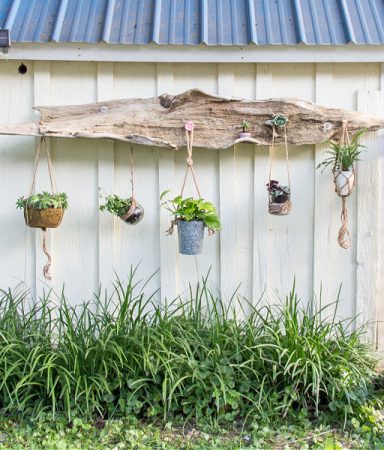
As snow still falls on a good portion of the country, I know a lot of people are looking forward to spring. I’ve heard some people are trying to bring the outdoors in this season with hanging planters, while others are still enjoying winter craft projects. Here in California, we’ve had a few chilly (and rainy) days, but for the most part we are still outdoors, which means I’ve got an early start on my spring crafting with macramé plant hanger!
I absolutely love hanging plants. There’s something so peaceful about them swaying in the wind a little, and being able to see them hanging outside my office window. Plus, with the tiny backyard we have I like to keep as much of the ground as possible so the kids and dog have more space to run around and play.
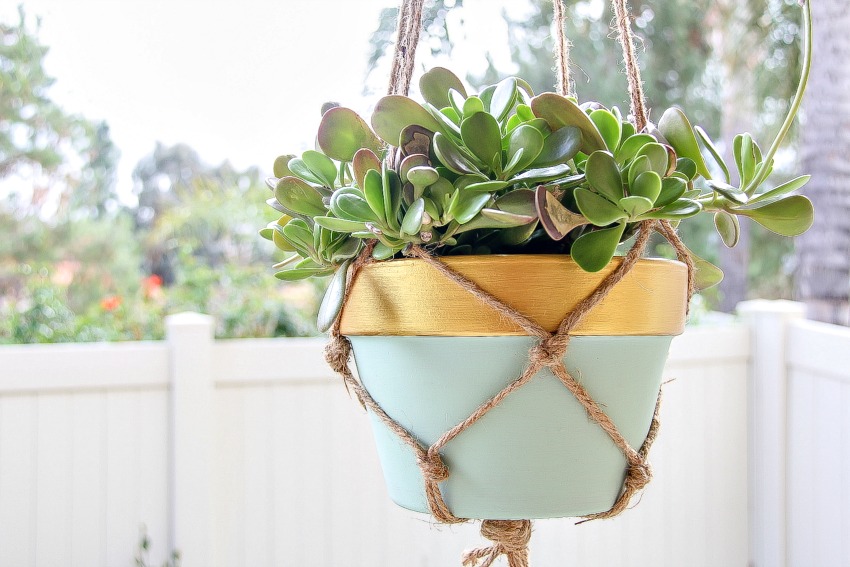
DIY Macramé Hanging Plant Holders
Macramé can seem a little daunting when you look at some of the elaborate designs, so I want to show you the basics, and have you creating a lovely macramé hanging plant holder in about 30 minutes.
Here’s a quick definition of macramé, to help first timers understand what you’re getting in to:
macramé
the art of knotting cord or string
in patterns to make decorative articles
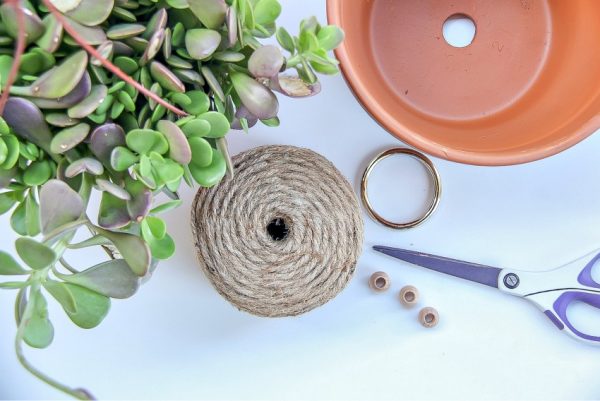
Supplies:
- Macramé rope – or alternatively I used a thick hemp cord – you could even cut up old t-shirts.
- Pot – I used a simple terracotte pot, and then painted it
- Plant
- Beads – make sure they have a hole large enough to thread a double strand of cord through. I used plain wood beads, and then painted them gold.
- Scissors
- Tape measure
- Large ring
Instructions:
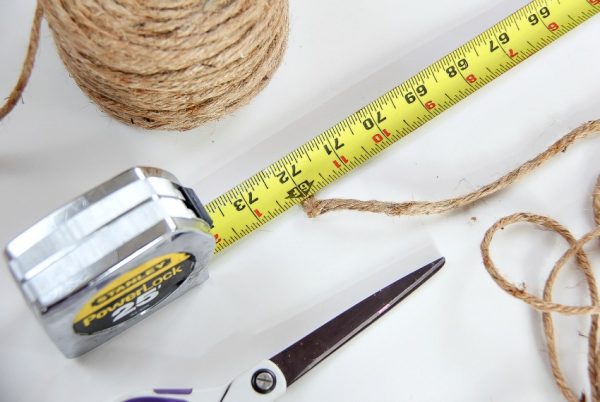
Decide where you are going to hang your planter, and how low you want it to hang. Cut 4 identical length pieces of cord. I made mine 6ft long, this means when the cord is doubled over it was 3ft in length. Put that next to your pot and see if that’s the length you desire, if not, cut longer pieces.
Once you have your four cord pieces cut, fold them in half and place the end inside the ring to form a knot.
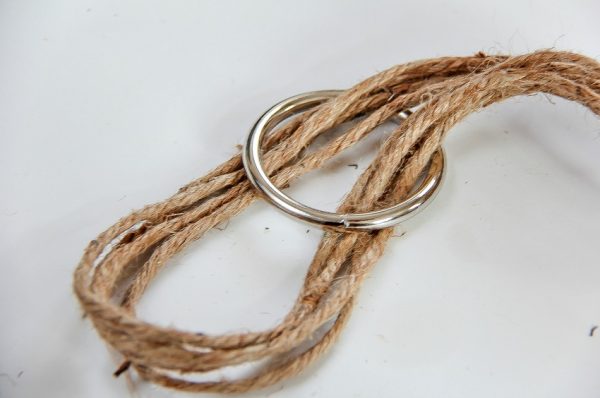
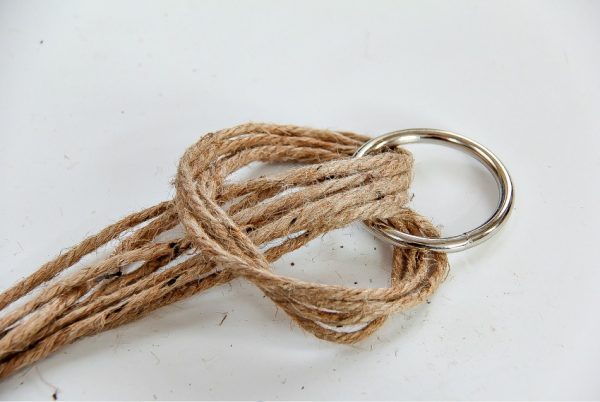
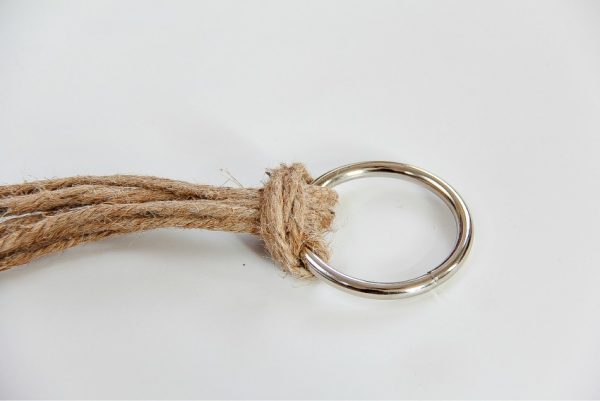
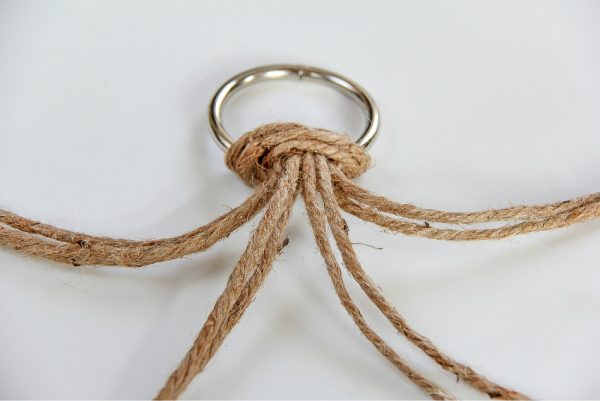
Don’t just pull all of the strands tight to make the knot tight, but pull each piece of cord individually, you’ll notice the difference. Your planter is going to hang from this ring. Let’s start working our way down the cord to create our macrame ‘basket’ that will hold the planter.
Place the cord alongside the pot to determine how far down you need it to sit … keep in mind you need to allocate a little extra space for the knots, and also for the tassel underneath the pot. Now, separate your cords into groups of two.
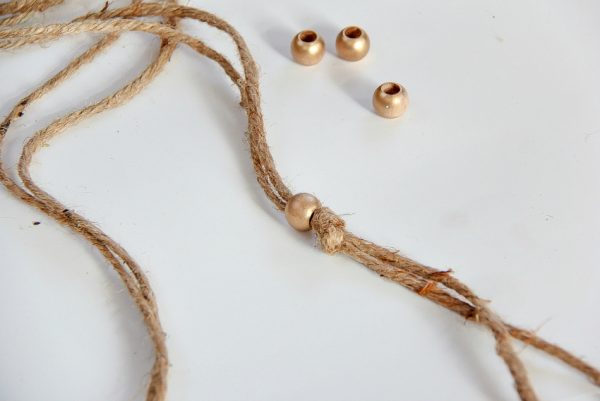
Thread a bead onto one group of cord and place it just above where the top of the pot will come to. Tie a knot directly underneath it. Do this with the other three groups of cord.
Lay two of the groups side-by-side. Take the right cord from the left group, and the left cord from the right group and tie them together about halfway down where the pot will sit (you’ll need to measure how far down to form your knots). Do the same thing over and over until all four groups are now attached and there’s a diamond shape forming.
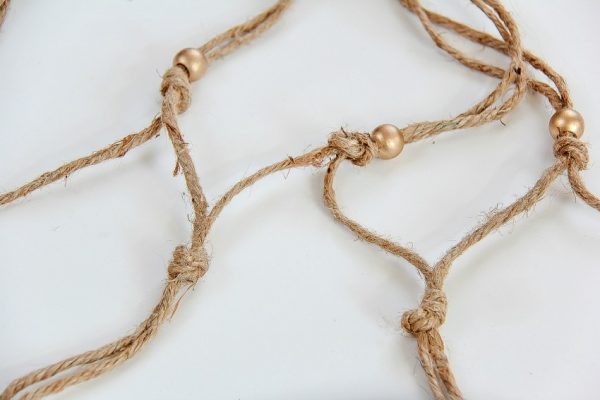
Now, do that last step one more time to create a net pattern.

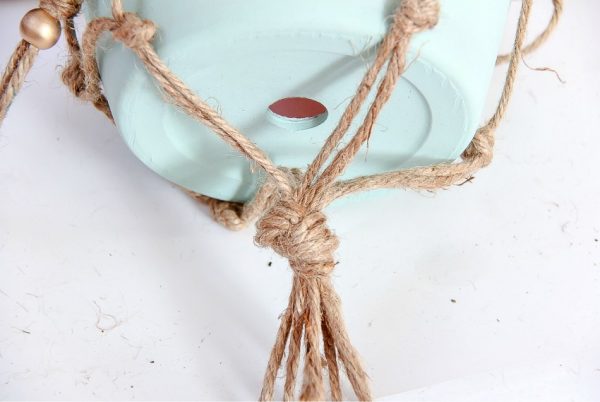
Hold all of the end strands tight with one hand and place your pot in the net to ensure you’ve got all of your knots in the correct places, and to see where you’ll need to tie the final knot that sits under the base of the pot with the tassel underneath. If you don’t have your knots in the correct places, you can untie and move them. If you do, then tie your final knot, and place your pot inside your new macrame plant holder, and hang it up.
I cannot wait to have an assortment of these in different sizes and colors hanging around our front porch and back patio.

Please pin this post for later.


So glad to see the post as it refreshed my memory as an early teen in 4-H.
So here i am again many years later making some beauties.
Thank you
Very nice! I make these in garden twine as slings for my melons on a vertical trellis. My mother was into macrame back in the late 60s-early 70s when my brother and I were kids…. She had some lovely two-tiered plant slings (8 inch round pot in bottom and smaller 4 in pot at top) done in para-cord hanging in our bathrooms. Pothos and spiderplants… One day my little brother, about 3yrs old at the time, decided to play Tarzan off the edge of the bathtub with one of the slings. He grabbed the bottom tassel and swung out, the hook pulled out of the ceiling, and the two pots came right down on his head as he sat abruptly down on the floor! Thankfully, he wasn’t really injured, but the pots broke and there was dirt everywhere. The cat was also more than a little interested in some of her projects…
It’s amazing !!! I tried this diy and it’s the best one I have ever done.
It’s very easy.
Thank you sooooo much.
do you have to use the beads??
If you see me I’m probably eating too!!! I hate when I mess up a post with incorrect punctuation!
I’m going to paint wood beads with my little ones then create these hangers! Thanks for the post! If you see me I’m probably eating too ?
I was hoping to see a picture of the whole thing from top to bottom! ?
THANK YOU! This was really fast, easy, and free.
Thank you for making this so easy! I’m excited about all the possibilities I have now for the zillions of plants living in every corner of my home.
What size cord/ rope is this that you used? (Diameter)