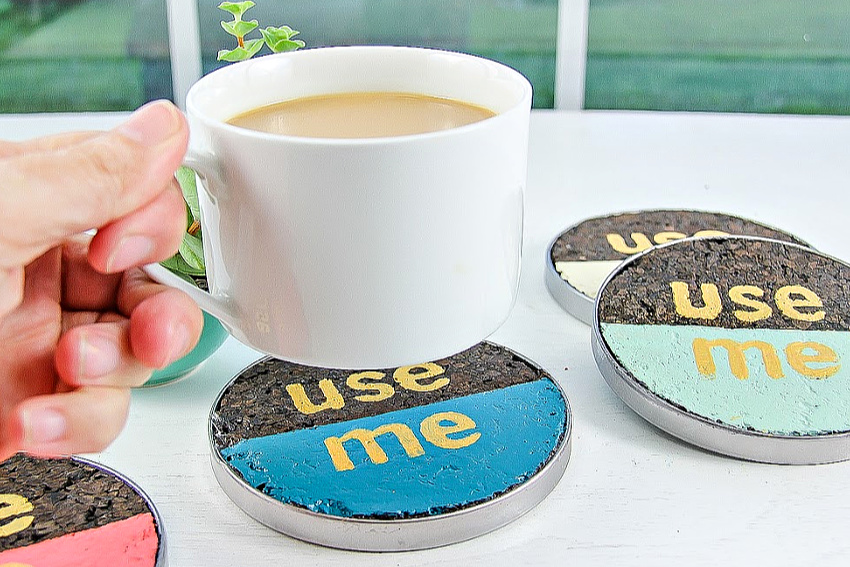
How many times have you gone to clear dishes away from the table and there’s a water ring, or even worse, a burn mark from a hot cup? Cork coasters are surprisingly easy to make, they make a wonderful handmade gift, and will help protect your furniture too. If you are looking for more coaster ideas, take a look at these crocheted coasters too.
Keep handmade coasters readily available on all of your wood tables, from coffee tables, to side tables, and of course, the dining table. They are more likely to be used if they are right there.
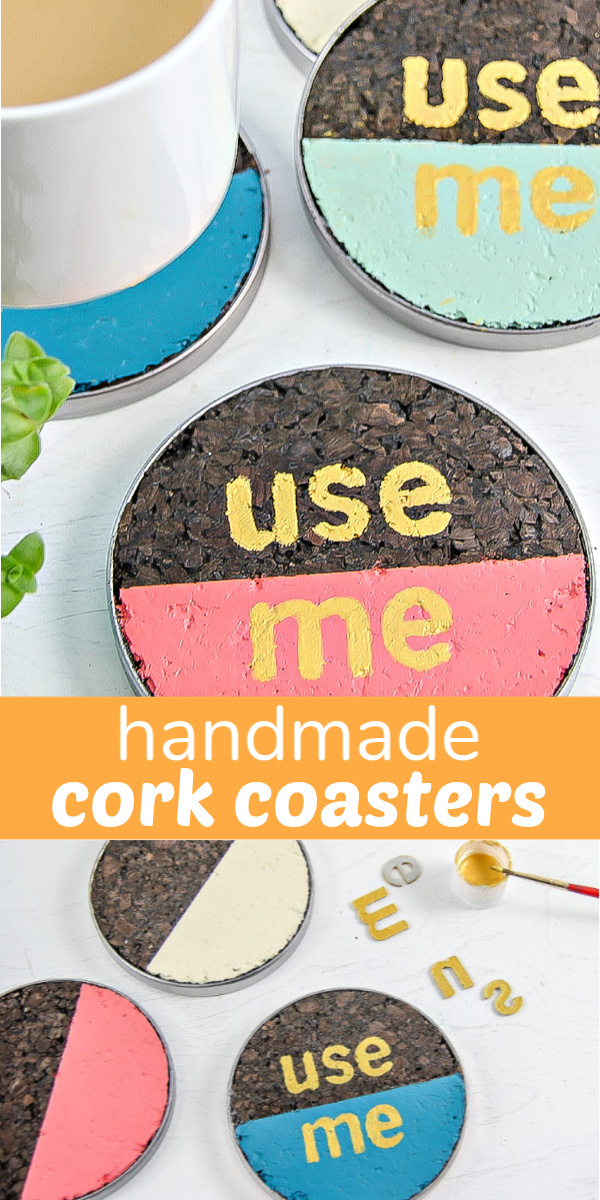
DIY Cork Coasters
Supplies:
- Cork sheets
- Paint and brush
- Primer and sealer (or shellac)
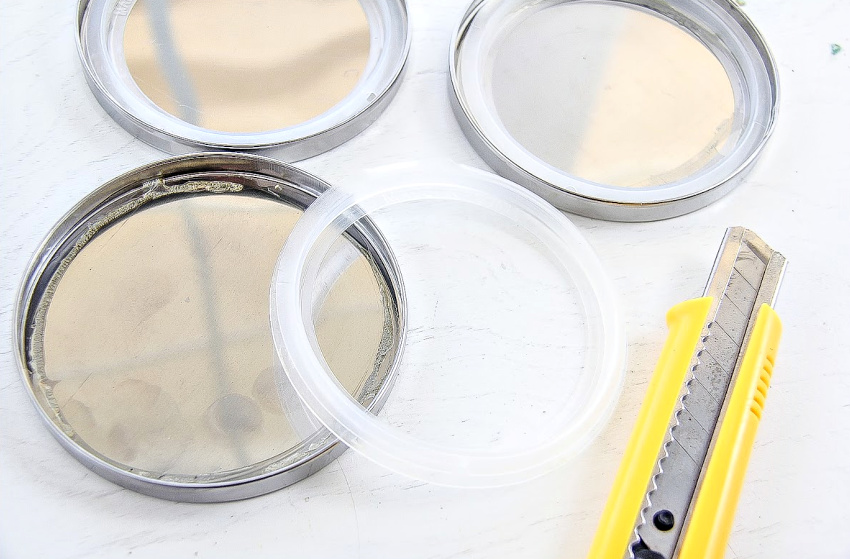
- Base for your coasters – I used candle jar lids, but you could also try mason jar lids, metal clamps, or even egg rings
- Glue – something strong such as E6000
- Painter’s tape
Instructions:
As I mentioned above, I re-purposed jar lids from candles to make these coasters. The first thing you need to do is remove the plastic seal inside the lid that helps it stay on the jar. We often re-use jars as drinking glasses, vases, or for candy and treats for parties once they are completely cleaned out of whatever was previously in them.
The next step is to place the lid onto the cork sheet, trace around it, and cut it out.
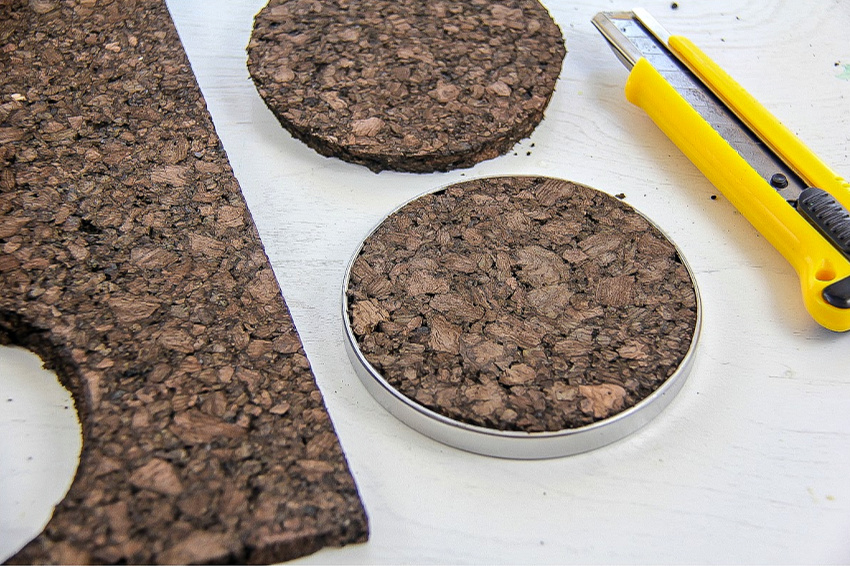
Place the round cork inside the lid, adhering it in place with glue.
Note: I loved this dark cork, but because it’s not like the regular noticeboard cork it does flake off in little pieces. By placing it into the lid it prevents that mess, plus it means you can place it on top of your glass if you are outdoors and want to protect your drink from bugs.
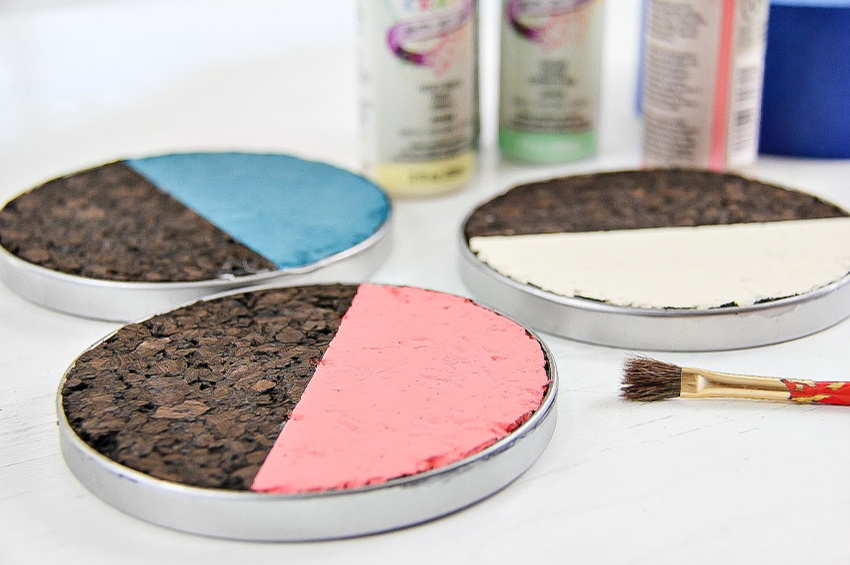
Next, place painter’s tape over the section you do not want to paint a solid color, and then apply a primer over the other half.
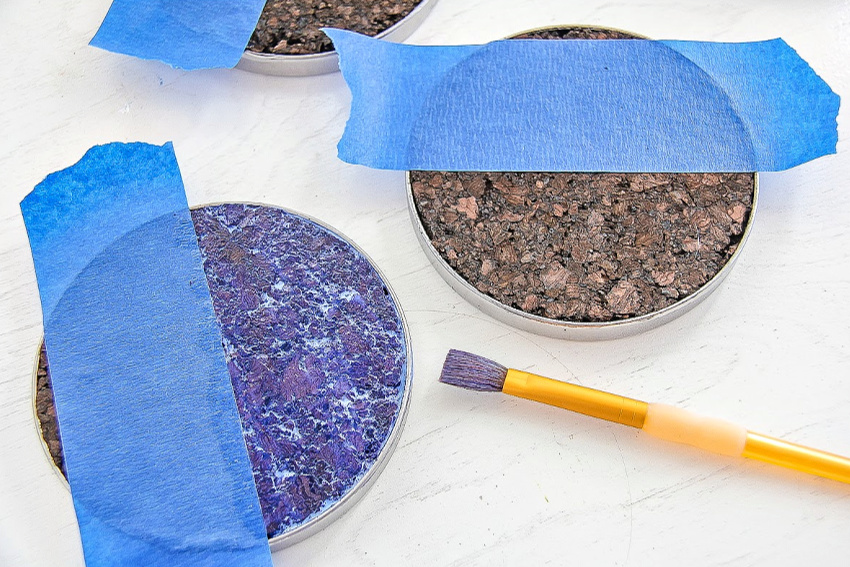
Once dry, apply 2-3 coats of your favorite color.
You can leave them just like this, just be sure to apply a few coats of a good sealer (or shellac) over the top. This will help prevent damage from moisture on glasses, and the paint from bleeding through the cork.
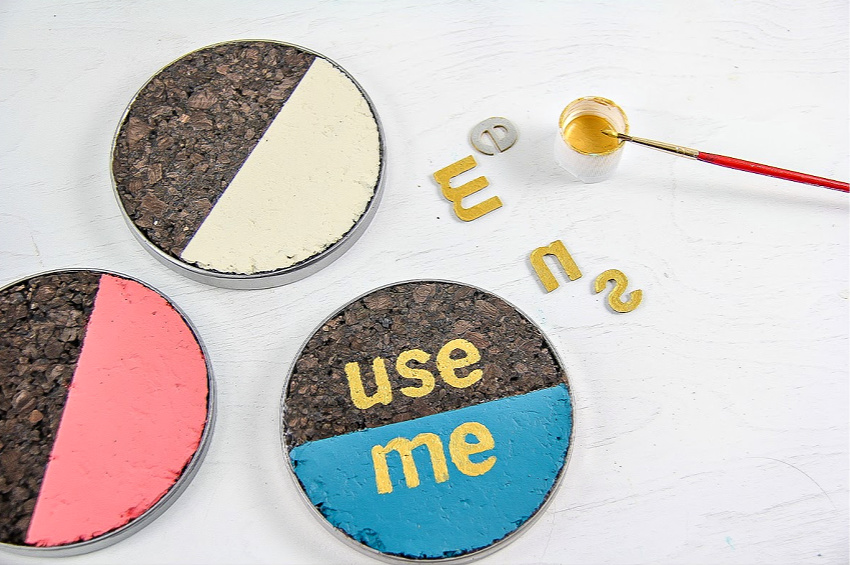
Or, you can keep on painting and add a word or two.
I had these chipboard letters, so used them like stamps. I painted the back side of each, stamped them on top of the cork, and then painted a couple of coats of paint over the top.
Once your coasters are completely dry, don’t forget to seal them with a good quality sealer or shellac to help protect them.

Please pin this post for later.
*This post contains affiliate links. Thanks for supporting Make and Takes!