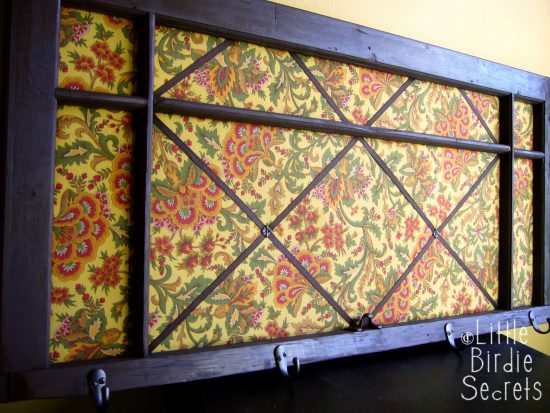
It’s January, so of course I have organization on the brain! My fridge gets so cluttered that I decided to make a message board to hold wedding invitations, baby announcements, party invitations, etc. using an old wooden window frame saved from an antiques flea market. No more cluttered fridge! Not only does it provide some much needed storage space, but it looks great on the wall!

Altered Window Message Board
Supplies:
- Wooden window frame with glass removed
- Optional – sand paper and paint (if your frame needs a makeover)
- Foam core board – enough to fit all the panes of your window
- Thin quilting batting (I used leftover pieces of Warm & White) – enough to wrap around foam core
- Fabric – enough to wrap around foam core
- Ribbon
- Decorative brads
- Stapler
- Glue gun or fabric glue
- Small nails and hammer
- Hooks (optional)
Directions: 
1. If your frame needs it, scrape off old paint, sand, and paint.

2. Measure window panes from back side of frame. Using an Exacto knife, cut foam core to fit inside each window pane.

3. Measure cotton batting or fleece to overlap the foam core 2-3 inches on each side. Cover each piece of foam core with the batting, folding over each side and stapling into place.

4. Do the same with the fabric pieces.


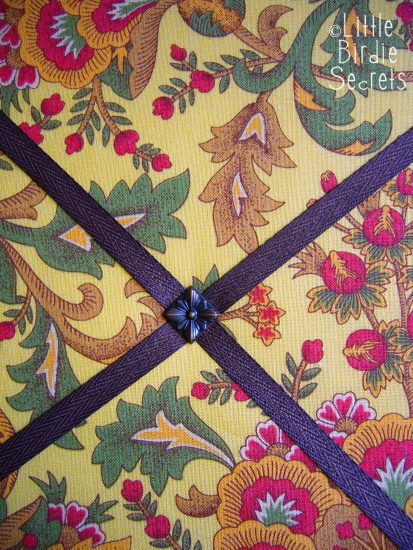
5. Lay ribbon out in diagonal, intersecting lines to create places to hold cards, pictures, etc. Glue only the pieces that fold over to the back using a fabric glue or hot glue gun. The ribbon should not be glued down on the front.

6. Press prongs of decorative brads into foam core where ribbon intersects. You probably won’t be able to open the prongs on the back, but they should stay in place anyway.


7. Insert each panel into corresponding pane.

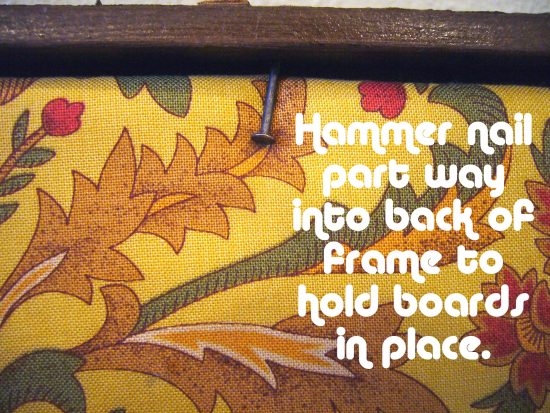
8. Hammer small nails part way into the edge of the frame around the edges to keep the boards in place.

9. If desired, attach coat hooks to bottom portion of frame to make it extra functional!

That’s it! Now you can use thumb tacks or the ribbon to organize your invites, photos, messages, reminders, etc.

 Little Birdie Secrets is a regular contributor to Make and Takes and was born from the crafting obsession of friends living in the Pacific Northwest. From quilting to card making to baking, we love sharing tips, tricks, and tutorials to make crafting fun and easy. Come visit us at www. littlebirdiesecrets.com.


Victoria’s Shrouded was established by Mr. Roy Raymond in the year 1970. The view behind the genesis of it was to have a cozy and inviting air that was similar to the victorian boudouir. There is a lot of interest in the normal brand. It was infatuated to past the Narrow Brands in the year 1982. Lone of the in fashion misconceptions around the its information is that it has a British heritage. The summary of the disgrace is associated with being youthful and romantic. Cultivation Nicholas had a lofty character in shaping up the history of Victoria’s Secret. The crowd has seen the delightful term down her leadership. She had joined the performers in the year 1986 as the unspecialized products head and VP. It was during that epoch that Victoria’s Cryptographic was considered to be song of the first-rate 10 brands across the globe.
Victoria s Secret Credit Card
Real good craft. Whenever I hang up something that large on my wall, I’m always scared to death that it’ll choose to fall just as my kids are passing underneath it…
very nice !
Fabulous upcycle!! I know I’ve walked past tons of these frames at the thrift store. Great project!
Awesome! Will have to give this a try…thanks for the inspiration!
Wow, I love this idea! Thank you for all your darling creativity sharing you do! I love your blog & to look it all the fun crafts to decorate with!