If there is a way to upcycle something and not throw it away, I will do it. Spring is almost here and it’s time to clear the clutter. We’ve got some fun ways to upcycle things you probably have in your home. Turn those old ceramic bowls into a bird bath for your garden, turn old jars into flower frog vases for flower arranging, and use fabric scraps to make our pretty DIY rag rug. You can also use torn items in your home for patching distressed jeans. We’ll show you how below.
Don’t throw out those torn linens, cushion covers, and quilts. We’ll show you how to re-purpose them for patching distressed jeans.
Patching distressed jeans
I had a beautiful cushion cover (years ago), but our dog decided to chew a corner off it. It was beyond repair, but I couldn’t bear to throw it away; it was just too pretty to part with. I knew eventually I would find a way to repurpose it. What I love about this project is you don’t need to have any sewing skills if it looks messy, it just adds more character to it.
What you need
- Distressed jeans with holes in them
- Fabric
- Embroidery thread
- Pins
- Needle
- Scissors
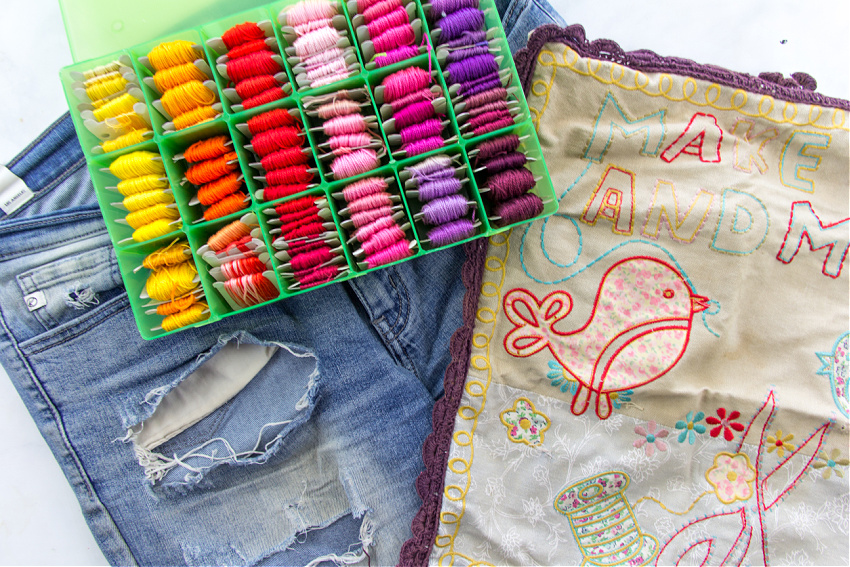
Tip: This is the perfect project to use items such as torn quilts, clothing, fabric, linens, bedding, curtains, and, like, I did, a cushion cover.
Instructions
The most important thing is don’t sew anything until it is pinned and you’ve tried them on. You might think it looks great while pinning, but when you try it on, you might want to move things slightly.
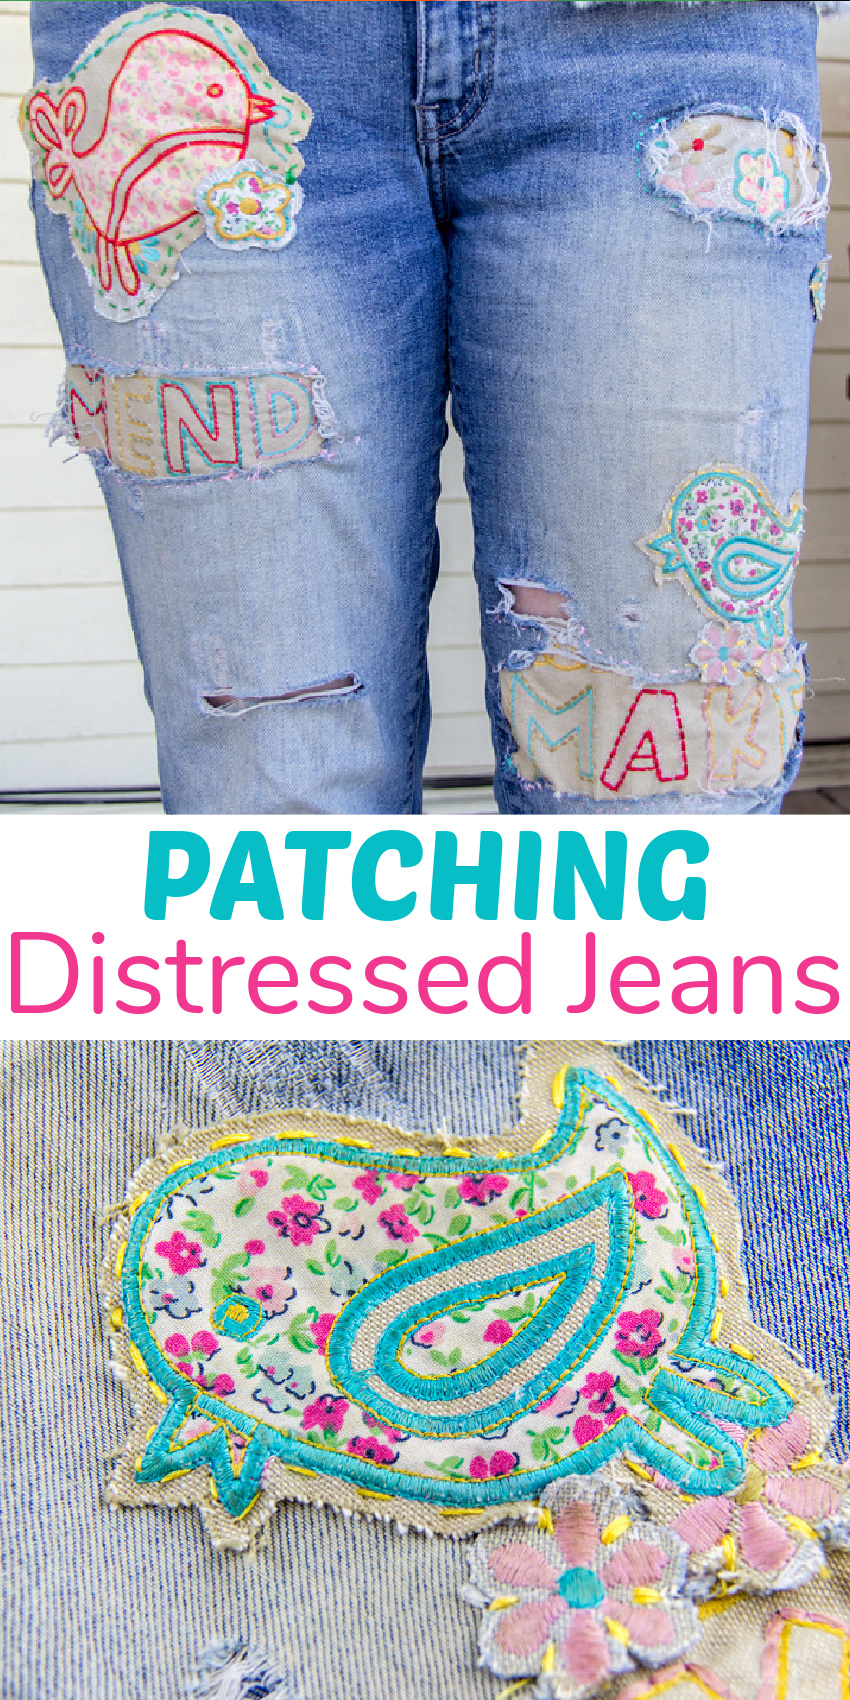
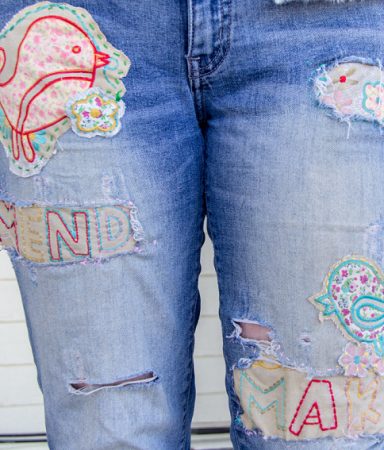
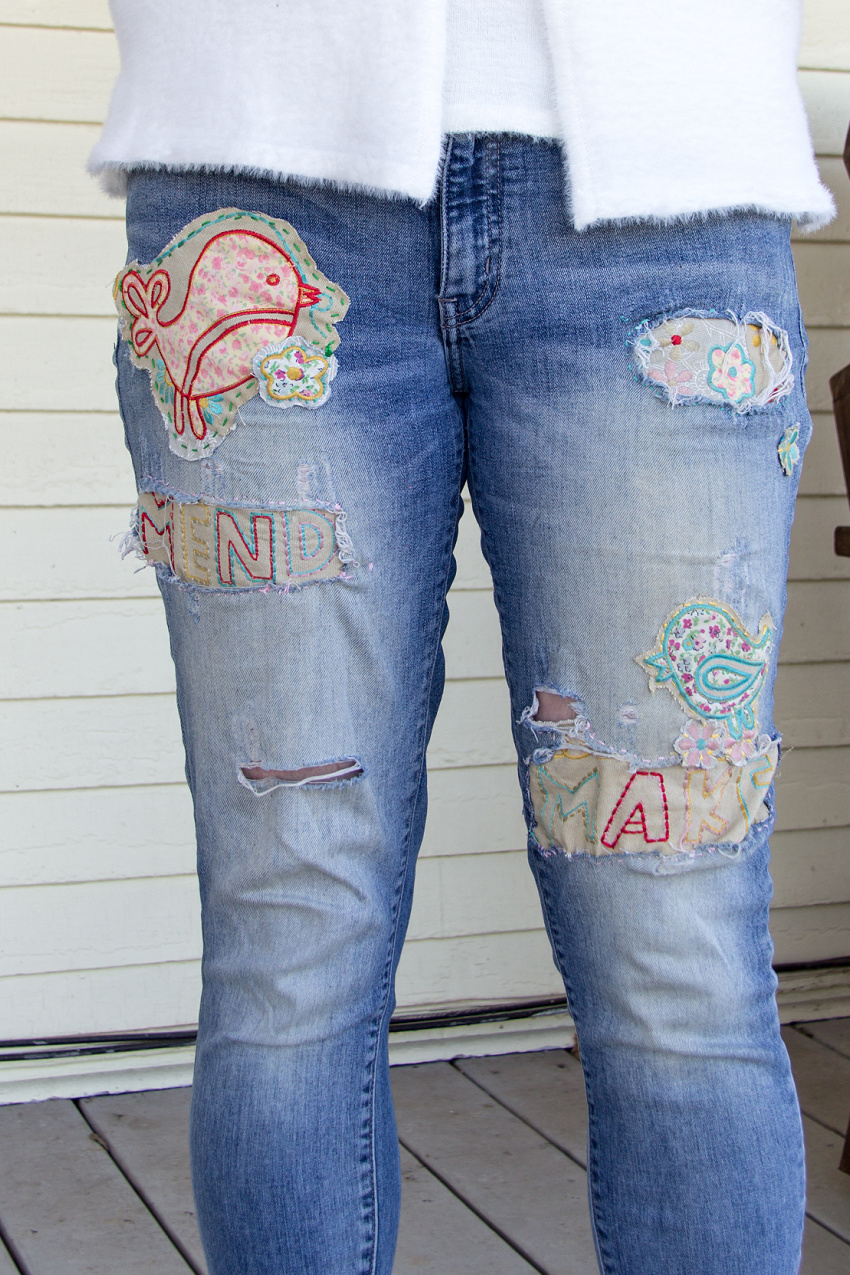
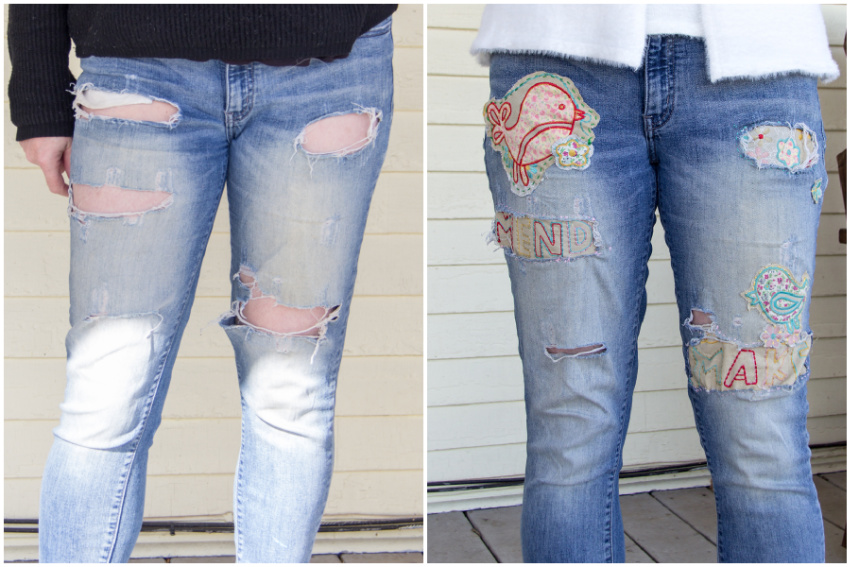
These are the jeans that I wanted to patch. I’m in my fifties and those worn areas are a little too high for me now, but I still wanted to make them look fun. The image on the right is where our puppy at the corner out of the cushion cover.
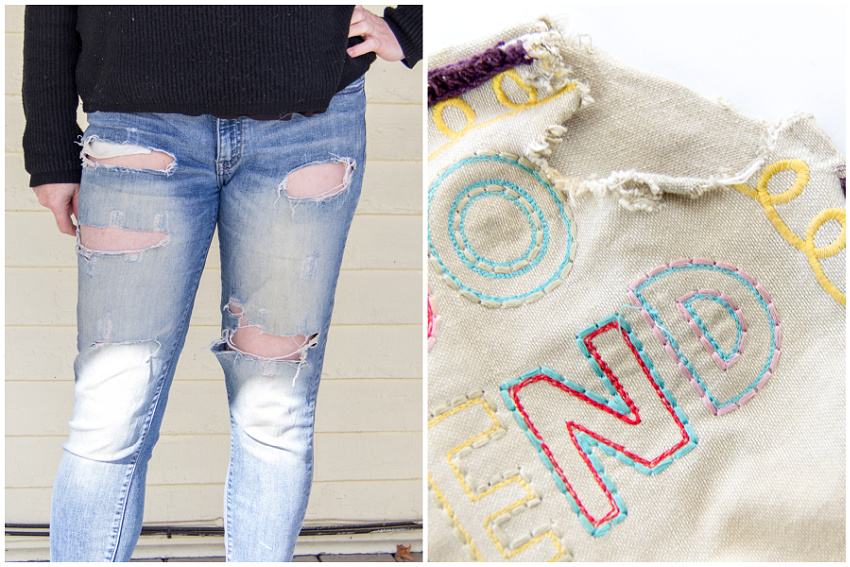
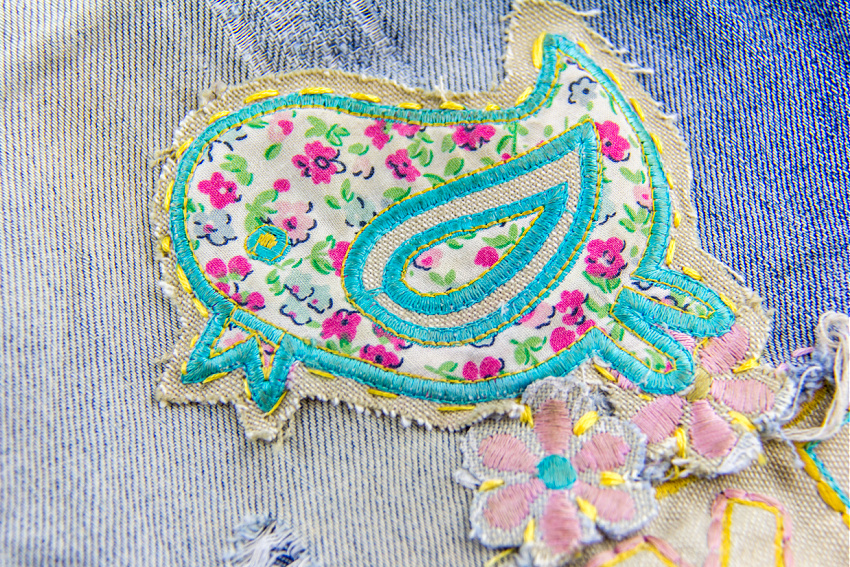
The first step is to measure the areas you want to patch and then cut sections that are (at a minimum) 5mm larger on all sides. The more the better because you need to allow for stretching and the fabric pulling. This is where it’s so important to pin the patches, walk, sit, and do everything as you normally would to see how they move before sewing them in.
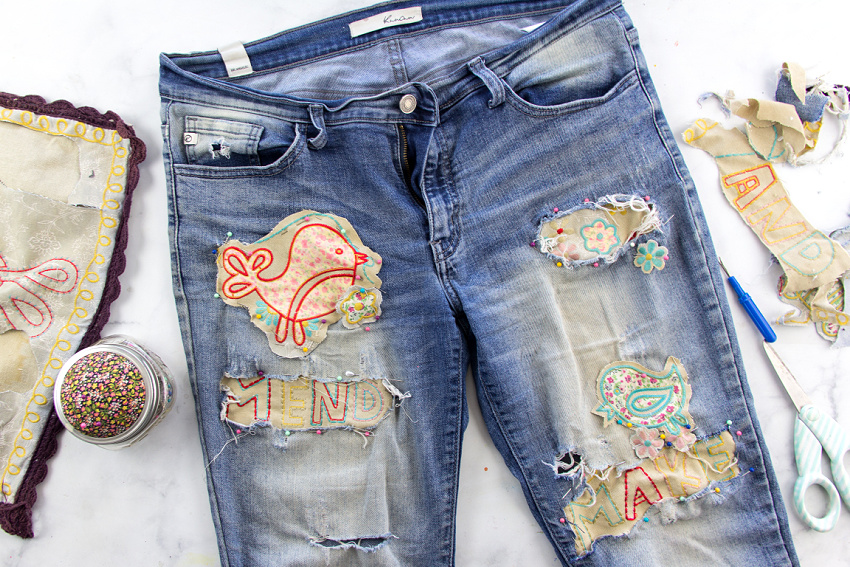
As you can see from the above photo, I tucked some patches inside the jeans, pinned some over the top, and layered others.
I even stitched a piece of crocheted border onto the top of the back pockets.
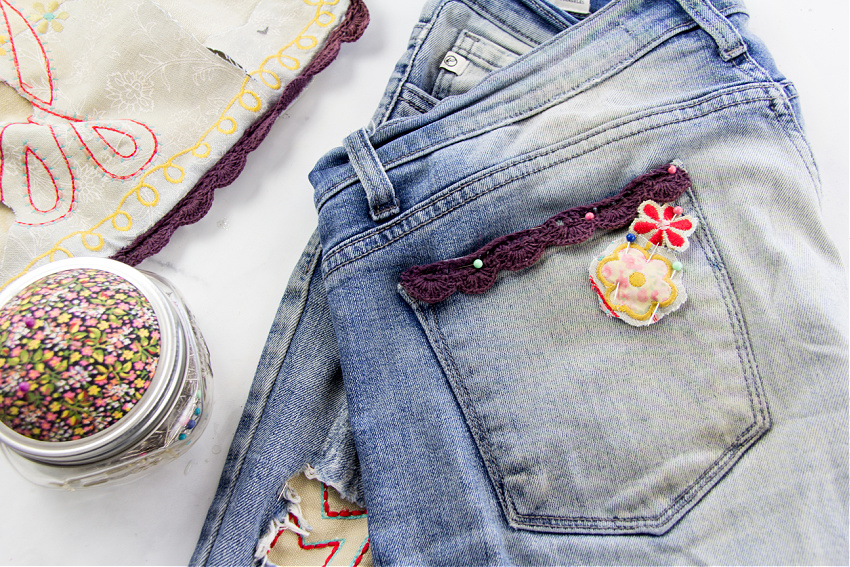
Once you have tried on your jeans and adjusted the patches if needed, use embroidery thread and a needle to stitch them into place. You do not need any fancy sewing skills to do this, but you may find you need to double-stitch some spots. I switched up the embroidery thread colors as I stitched each patch into place, matching the colors as closely as I could.
Tips: You can use fabric glue for patches before stitching. You can also purchase a fabric fray stopper if you don’t like the frayed ends that are bound to happen over time. Personally though, I like those frayed ends.
When the jeans were complete, they felt like they’d had a spring makeover.

Before and after patching my distressed jeans.
Please pin this post for later